From Orange Eyesore to Charming Craftsman: A Stunning Country Home Transformation
The exterior of my favorite interior design project to date.
Do you remember the interior I was tasked with de-oranging? If not, click here. This is the exterior. You’ll see in the below photo that it all makes sense. Eeek! If I did my job correctly, you should be in awe of how far this home has come by the end of this read; and hopefully even inspired. I appreciate you in advance for your support. The fabulous owners and I had to wait a bit to tackle the outside after the large project inside was complete. I was beyond ready to go when they gave me the green light, so let’s get into it!
Before - Consultation Day. Isn’t this crazy? It was orange inside and out!
Even the neighbors were shocked by this transformation! I still can’t get over it myself.
Poor thing used to be the ugliest house on the long country road…
Notice the columns, old wood trim between the stone and siding, lights, and trim around the door and sidelights.
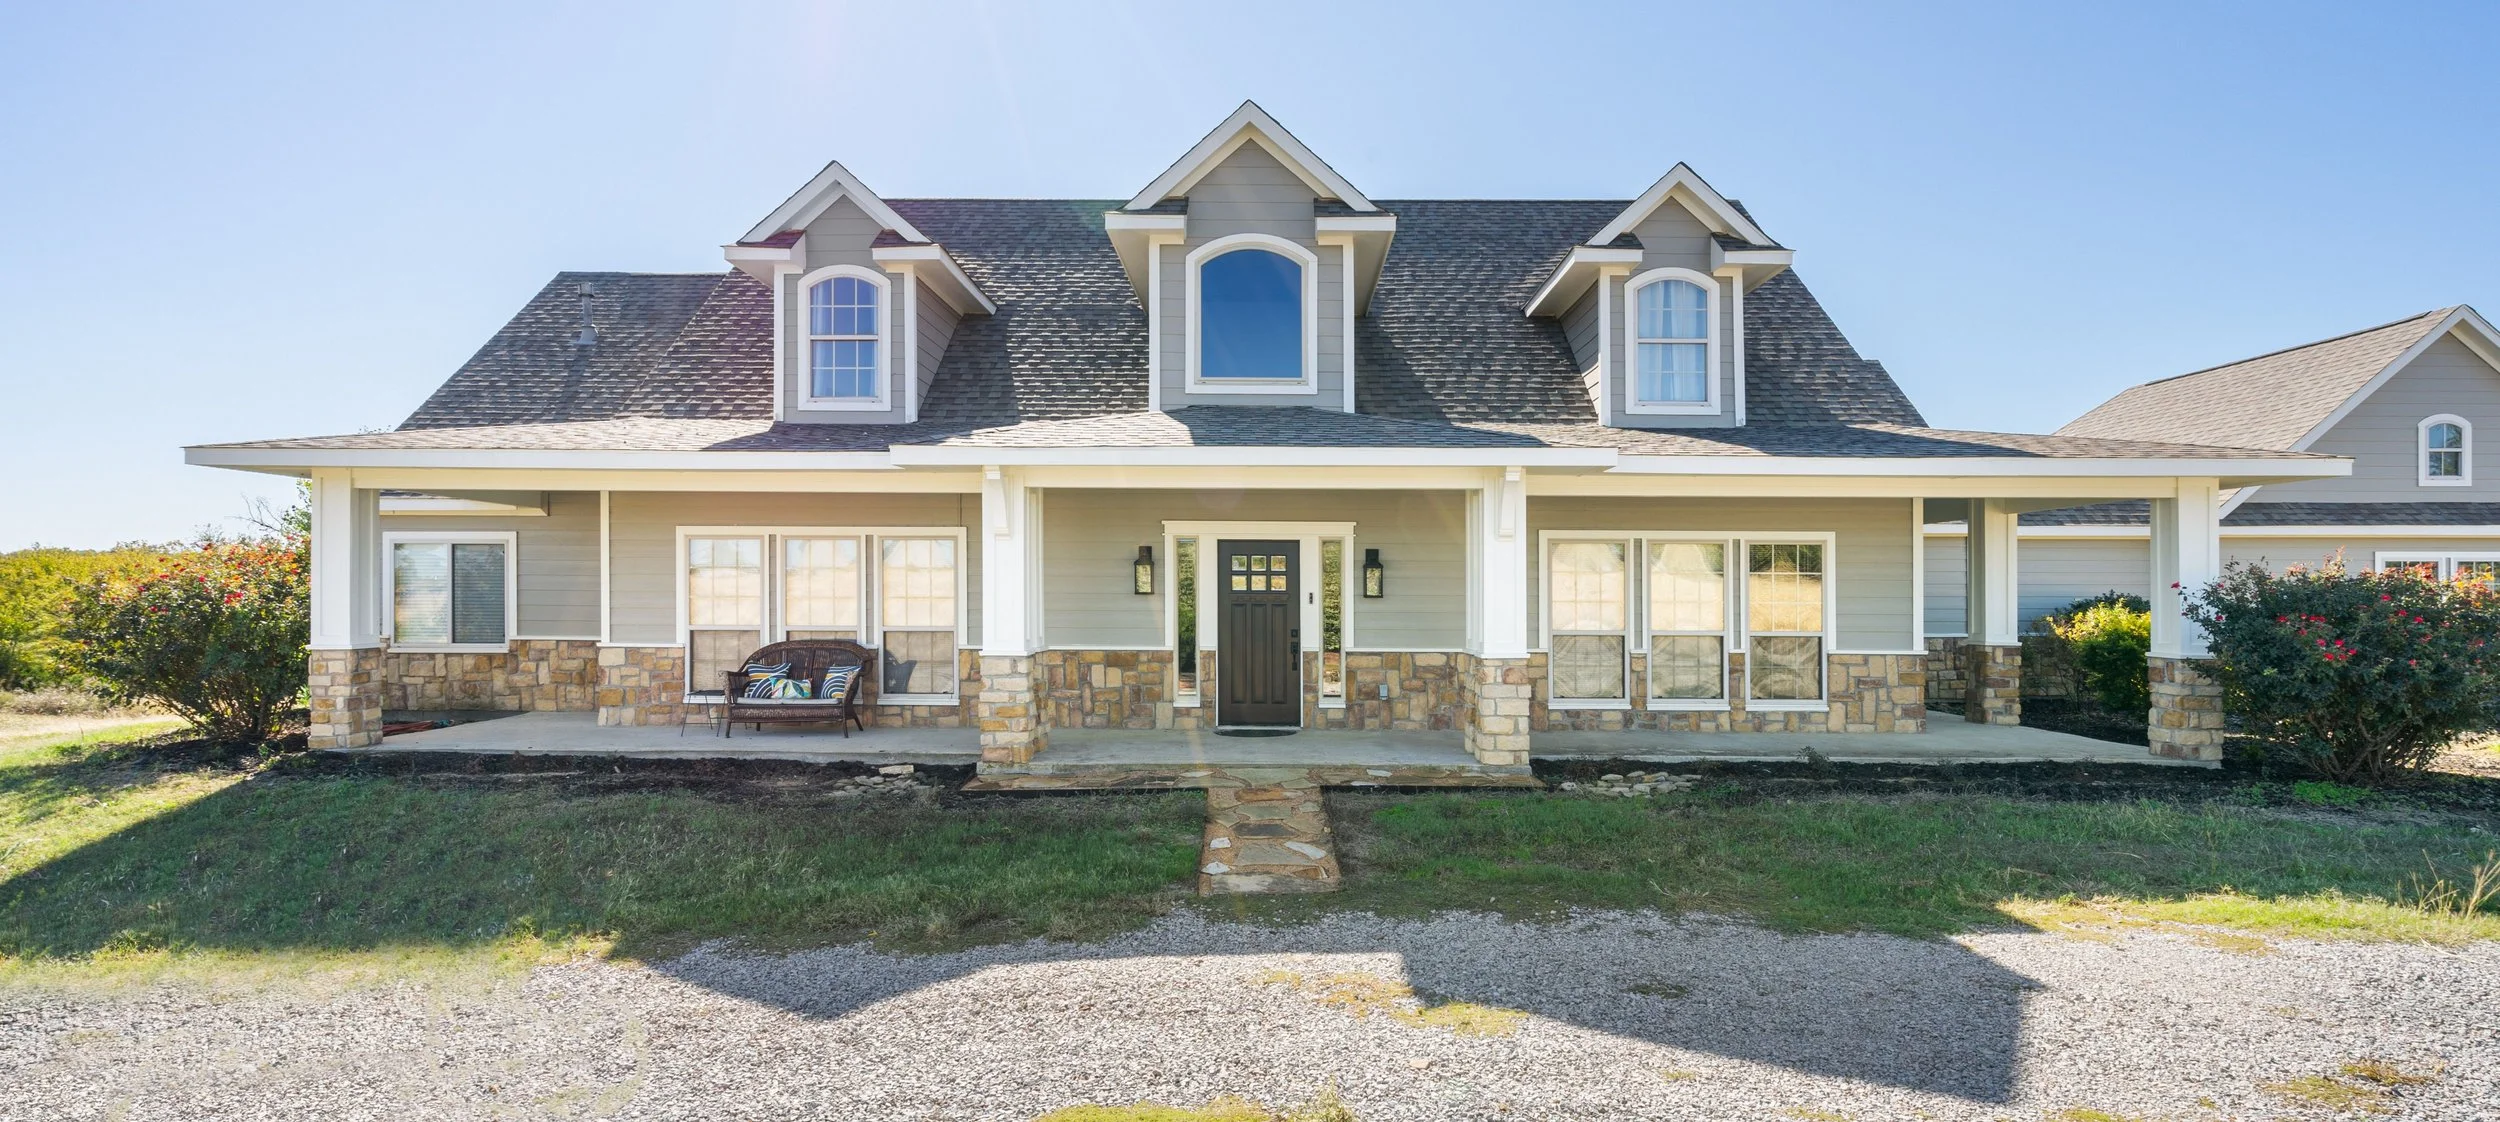
Now look at them all! Plus, the added corbels!
If you remember the columns inside the home and the way we trimmed out the door and sidelights together (shown below), you will see we brought that outside. It all flows and has Craftsman character!
Notice the columns and trimmed out door and sidelight. Ugh, I frickin’ love this house!
THE BRIEF
Like the inside, we needed to calm the orange way down. Obviously. But like the flooring, I was to work with keeping the stone on front. Also like the inside, I was encouraged to get creative with the details to add character and make the home more Craftsman. The back of the house is where the family relaxes and entertains, so we needed to replace the broken stairs with a deck outside the back doors and redo the pavilion. The pavilion itself was to have a TV wall and an outdoor kitchen setup.
THE COLORS
I would be big time lying if I said picking the body color didn’t give me some serious anxiety. Eek! It was a lot of pressure to make sure I got it right. (I take spending my clients’ money very seriously.) There was a list for me to consider. First, the front and back get very different sun. The front is obviously what is seen first, so it’s curb appeal, but the back gets the most life. Then we had the stone, the roof, the windows, and all the greenery that made it clear green was not a contender. Just so many factors. I had the perfect color in my head, but finding it was something. I am so thankful to my painter, Jorge, for all his patience with me. He is always a great sounding board for me, and gives me good input. I also appreciate him sending me photos from the jobsites. I asked for a few samples to be painted, including the trim color, and Jorge delivered perfectly. Fun fact, the trim color is the wall color inside. After a few sleepless nights I was settled with one of the samples. Can you guess which one? Comment the name on the tape you pick and I’ll let you know if you got it. These are all Benjamin Moore colors.
Progress - new trim and paint samples. Top is Revere Pewter. Bottom is Nantucket Gray.
Top is Pashmina. Bottom is Rockport Gray.
All the prep work is done. New trim and columns are ready for paint. Just waiting for me to pick a color.
After - It’s just sooo much better!
Let’s move to the back of the home.
Before - consultation day. More orange, and a tired space that wasn’t ready for relaxing or entertaining.
After - I ask the owners what it’s like being royalty now. I mean wouldn’t you feel fancy sitting on that deck with your cup of coffee in the morning?
Before - This is what sadness looks like. To be fair, the Texas sun killed the wood stairs in just a short time, but I wanted better for these good people.
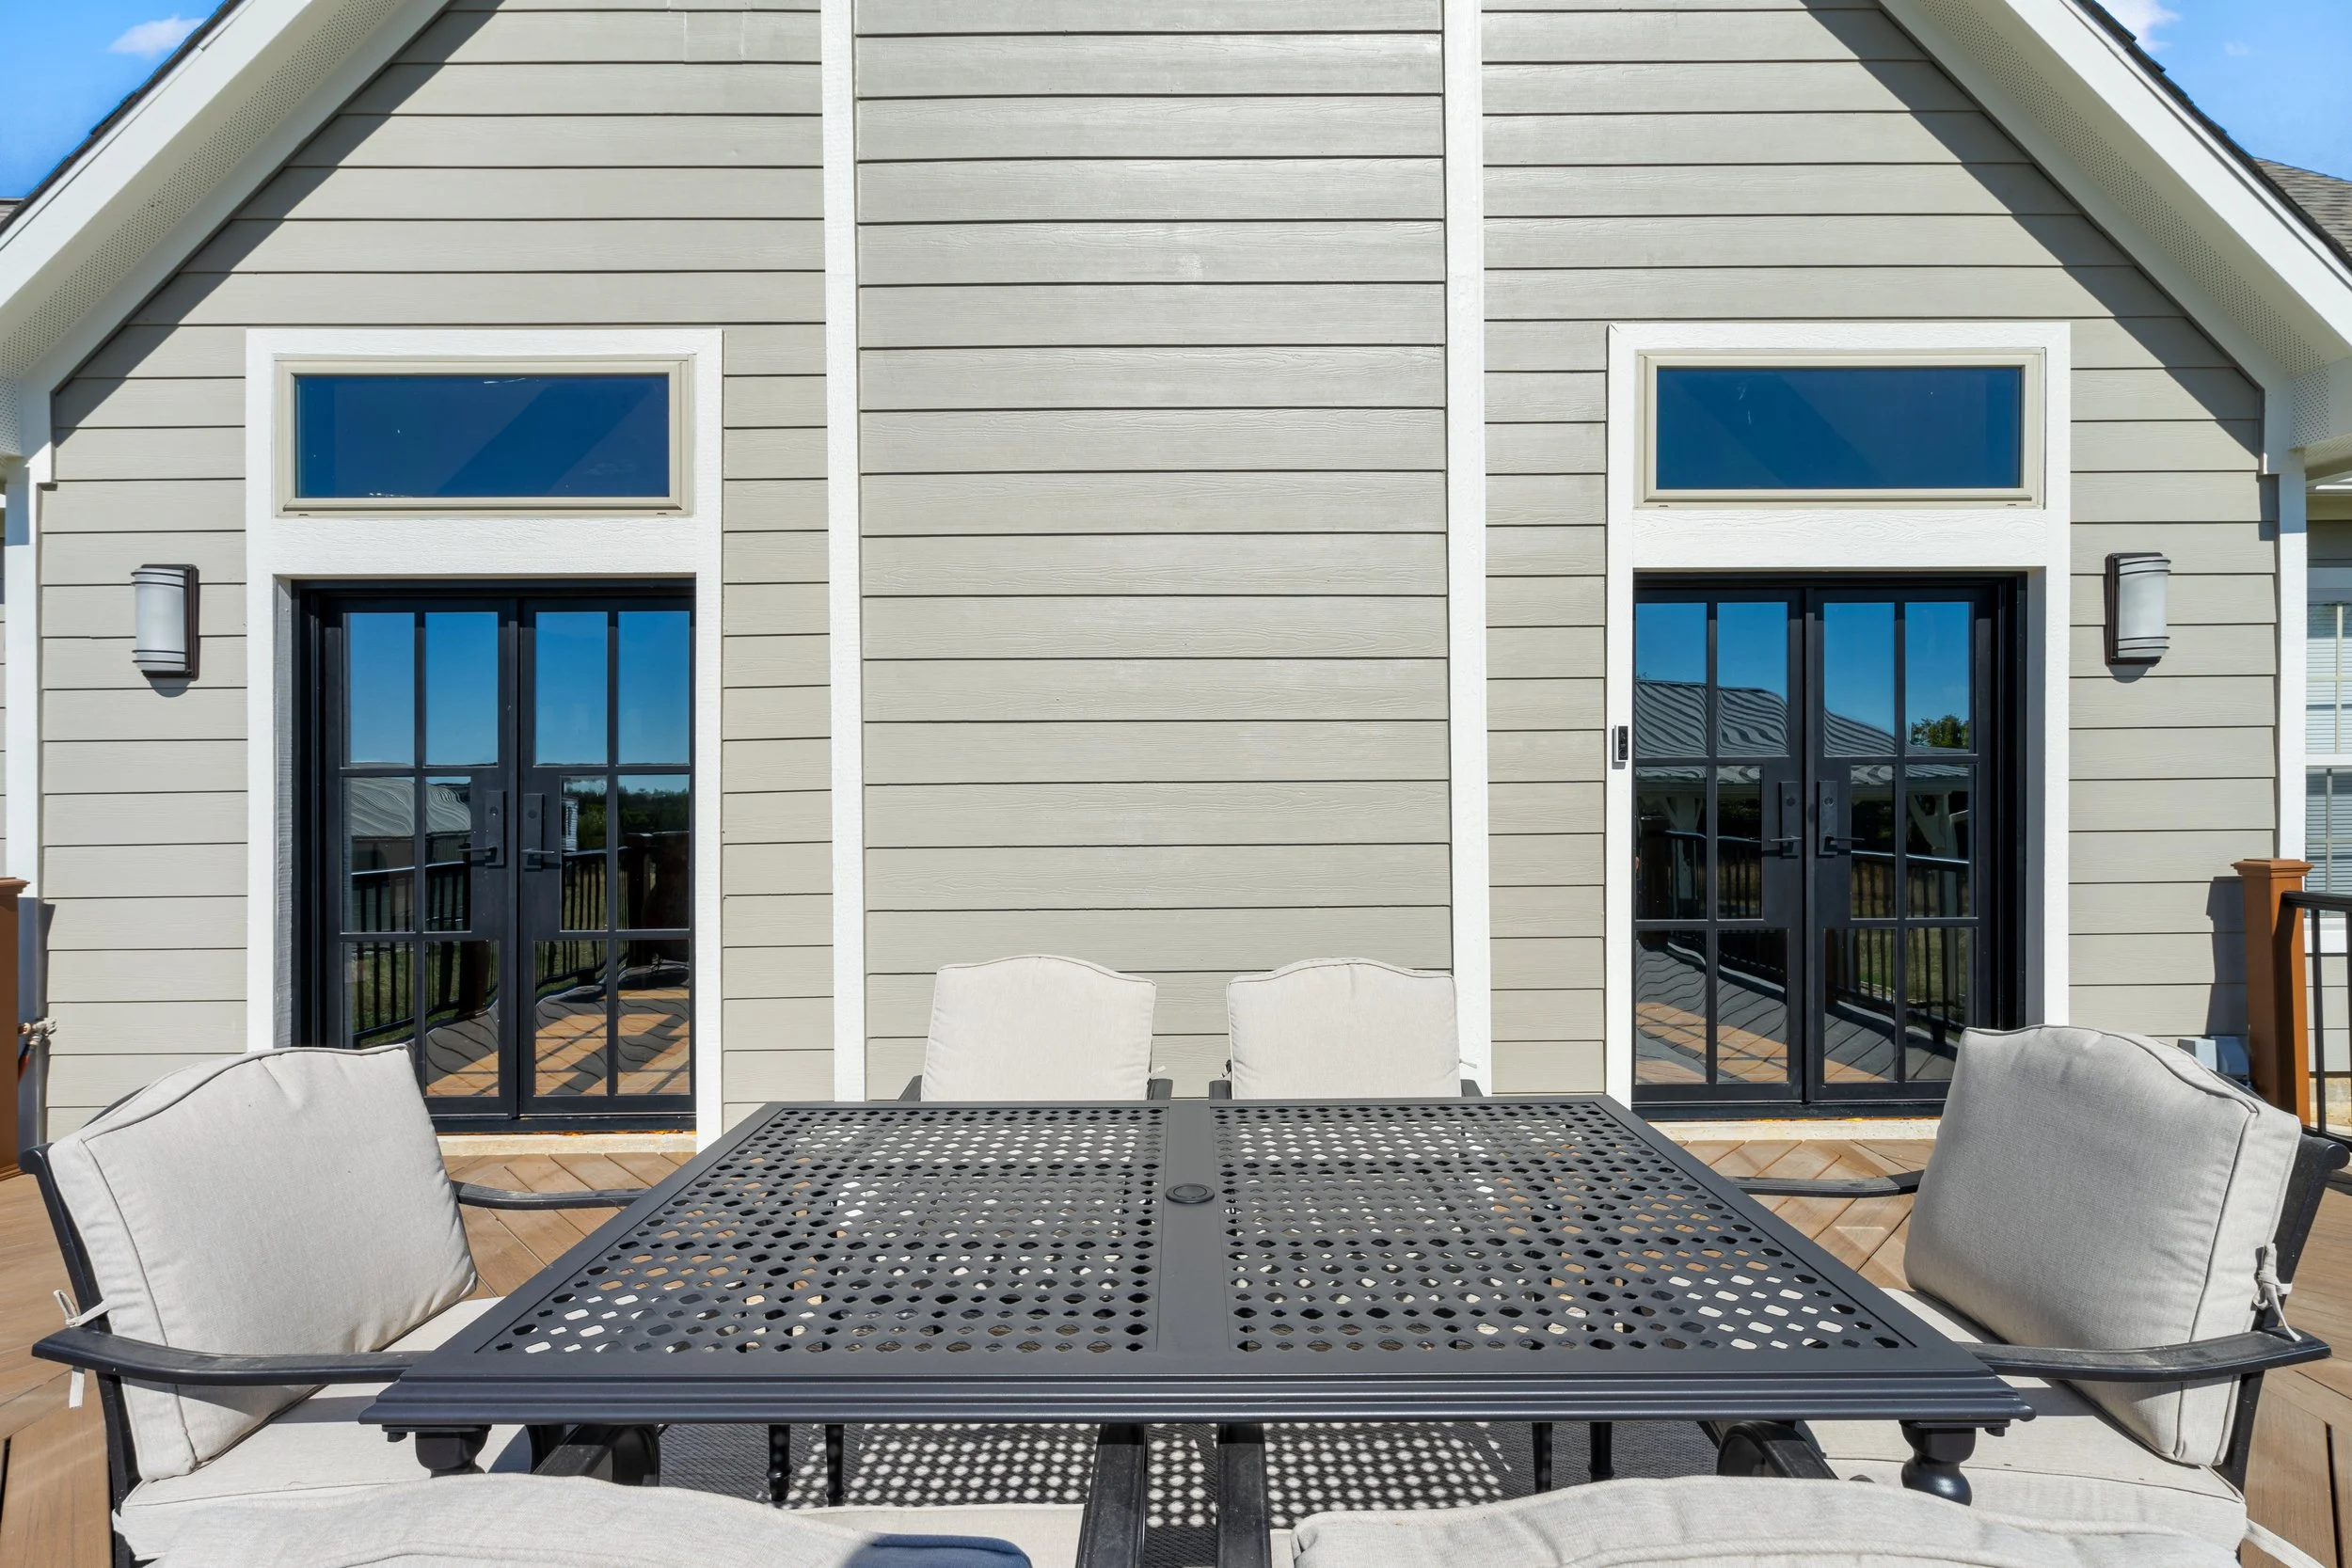
After - This is what you call magazine living. Yes, I’m jealous too.
I couldn’t wait for the storm doors to come off the back doors, the doors and windows to be framed out together, and for the chimney trim to be painted white. Every day I asked Jorge “Are we there yet?!” I mean, can you blame me? This is what I envisioned, and he did it so well!
The thing with all projects is there’s always something that comes up and tries to mess up the project; things you have to figure out to make sure you reach the finish line. For this deck, that something was the metal railings. We had to figure out how to get the right sizes. The answer was using Trex for the pole sleeves, but a different company for the railing.
The deck skirting is a simple lattice painted the same color as the house trim, but I didn’t use the basic lattice you probably can’t remember life without. First of all, that’s cheap looking. Second of all, that’s not Craftsman. This is thick and beautiful.
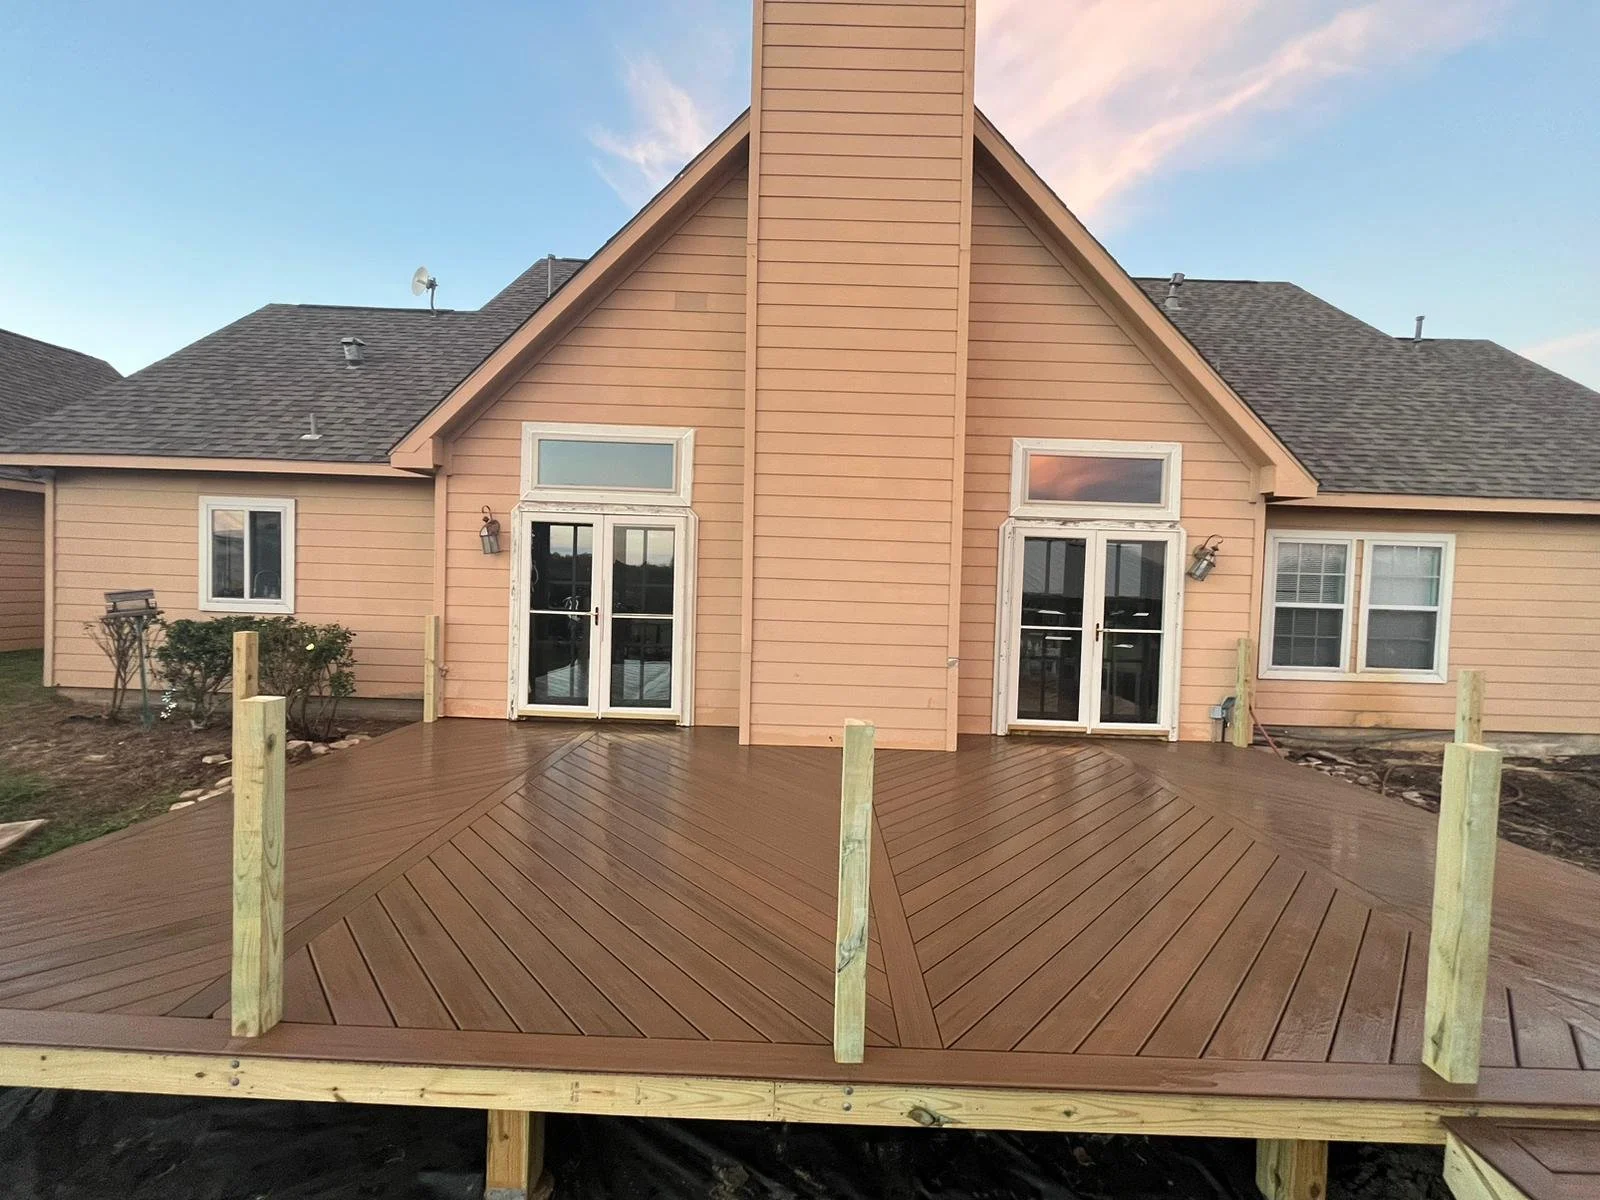
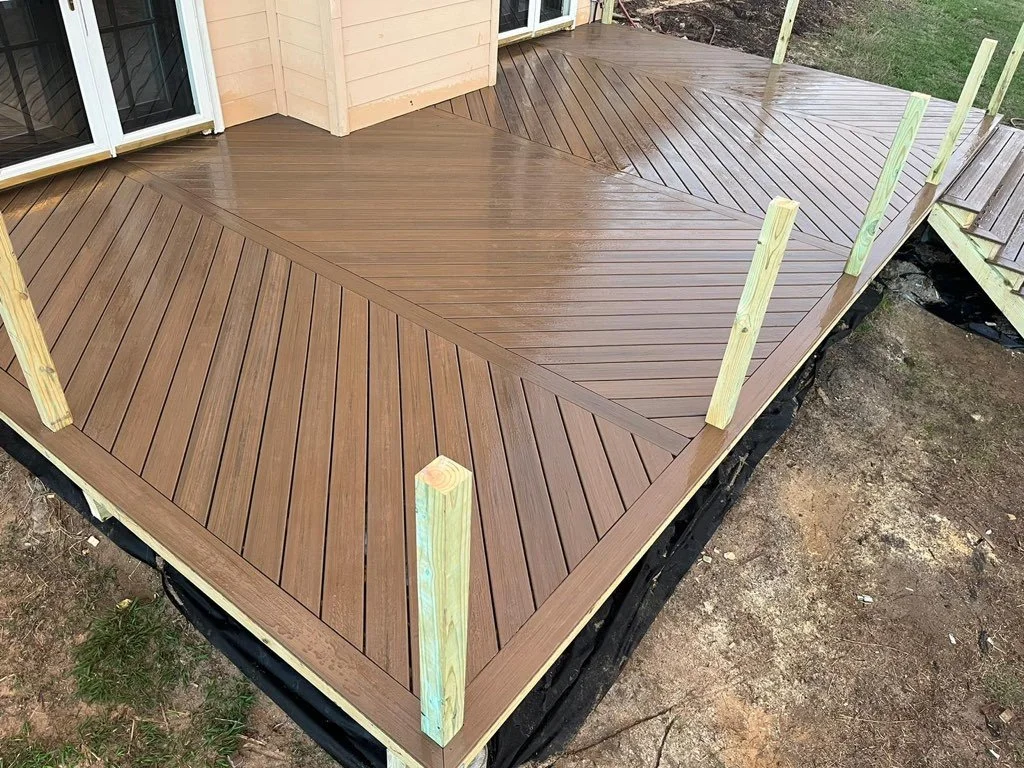
Deck progress - classic chevron pattern done beautifully!
Perfection.
Having a professional carpenter in my pocket is something I don’t take for granted. I mean look at what Rodrigo made happen for our client. Trust me when I tell you that the brainstorming between my pros and me is electric. I tell my clients that I have lots of ideas and my guys either help me figure out how to make them happen or tell me they’re not possible. Usually they figure out how to do it. Like this deck design. I didn’t want basic lines; that’s not fun or very Craftsman.
We used real wood for the support and Trex boards for the decking. Going back to how seriously I take spending my clients’ money, I thought about what the Texas sun did to their stairs in like two years. I didn’t want them to waste money on an expensive wood deck only for it to be a mess in no time. So I did tons of research and found that Trex was the best answer I could give them. The money spent up front should last them longer than wood could. So far, so good! The deck still looks new.
The paint samples with the deck on the backside of the home. One from the front four was too green, so we were down to three contenders. Which one do you think it is?
The finished look. The sconces are perfect for this home!
Do I even need to say anything?! Just look at it!
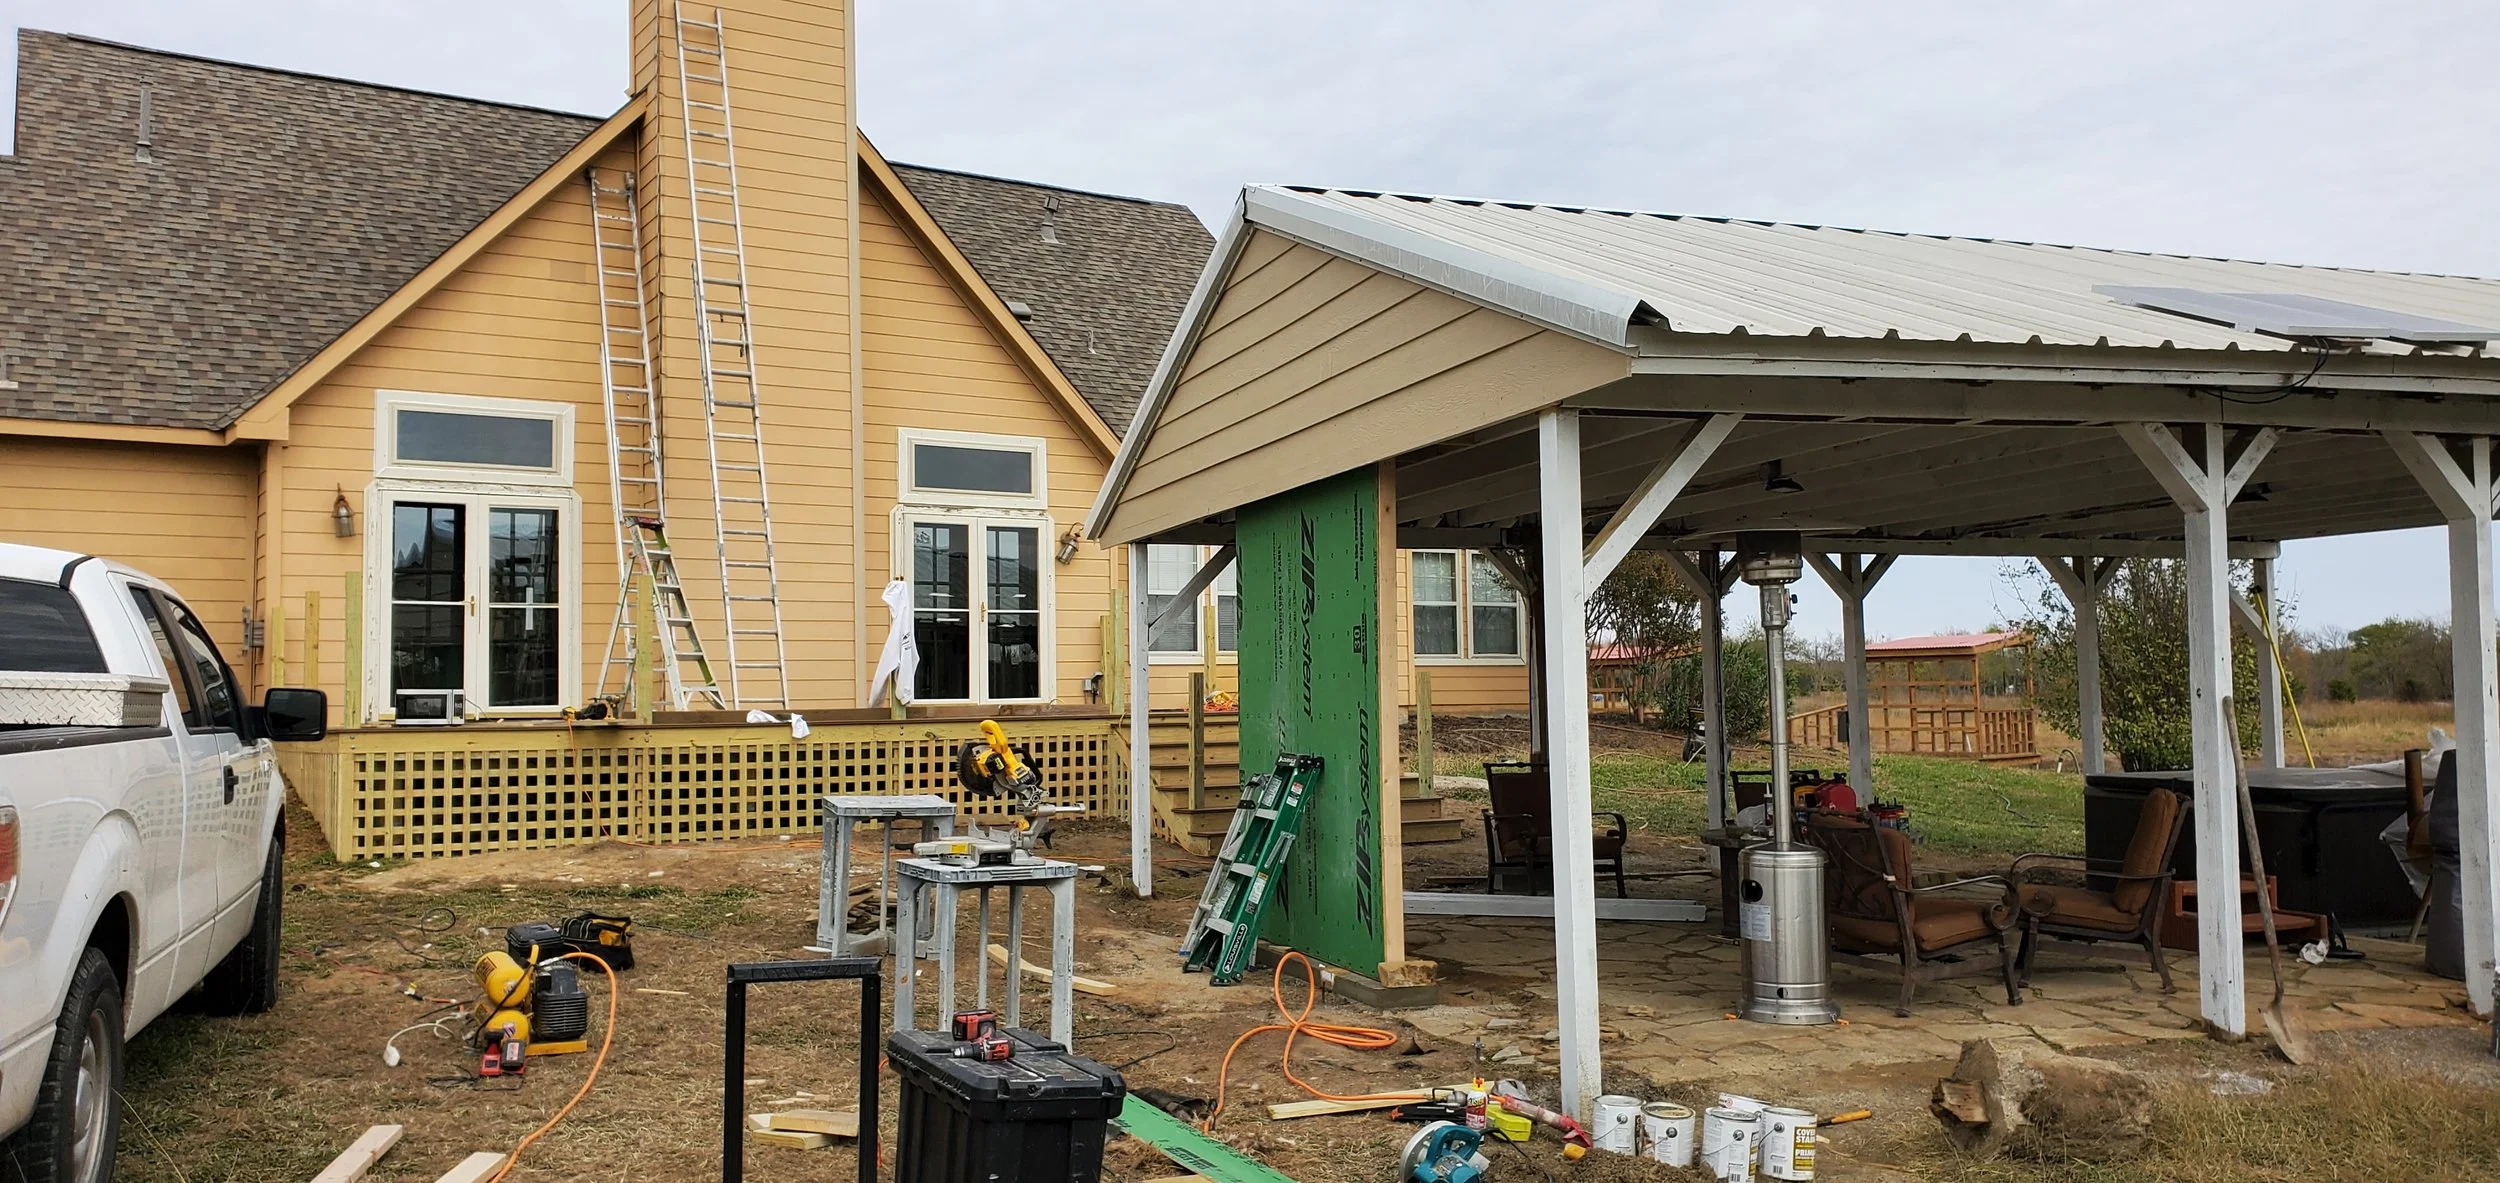
Progress - Lattice is on the deck, and the wall for the TV is started.
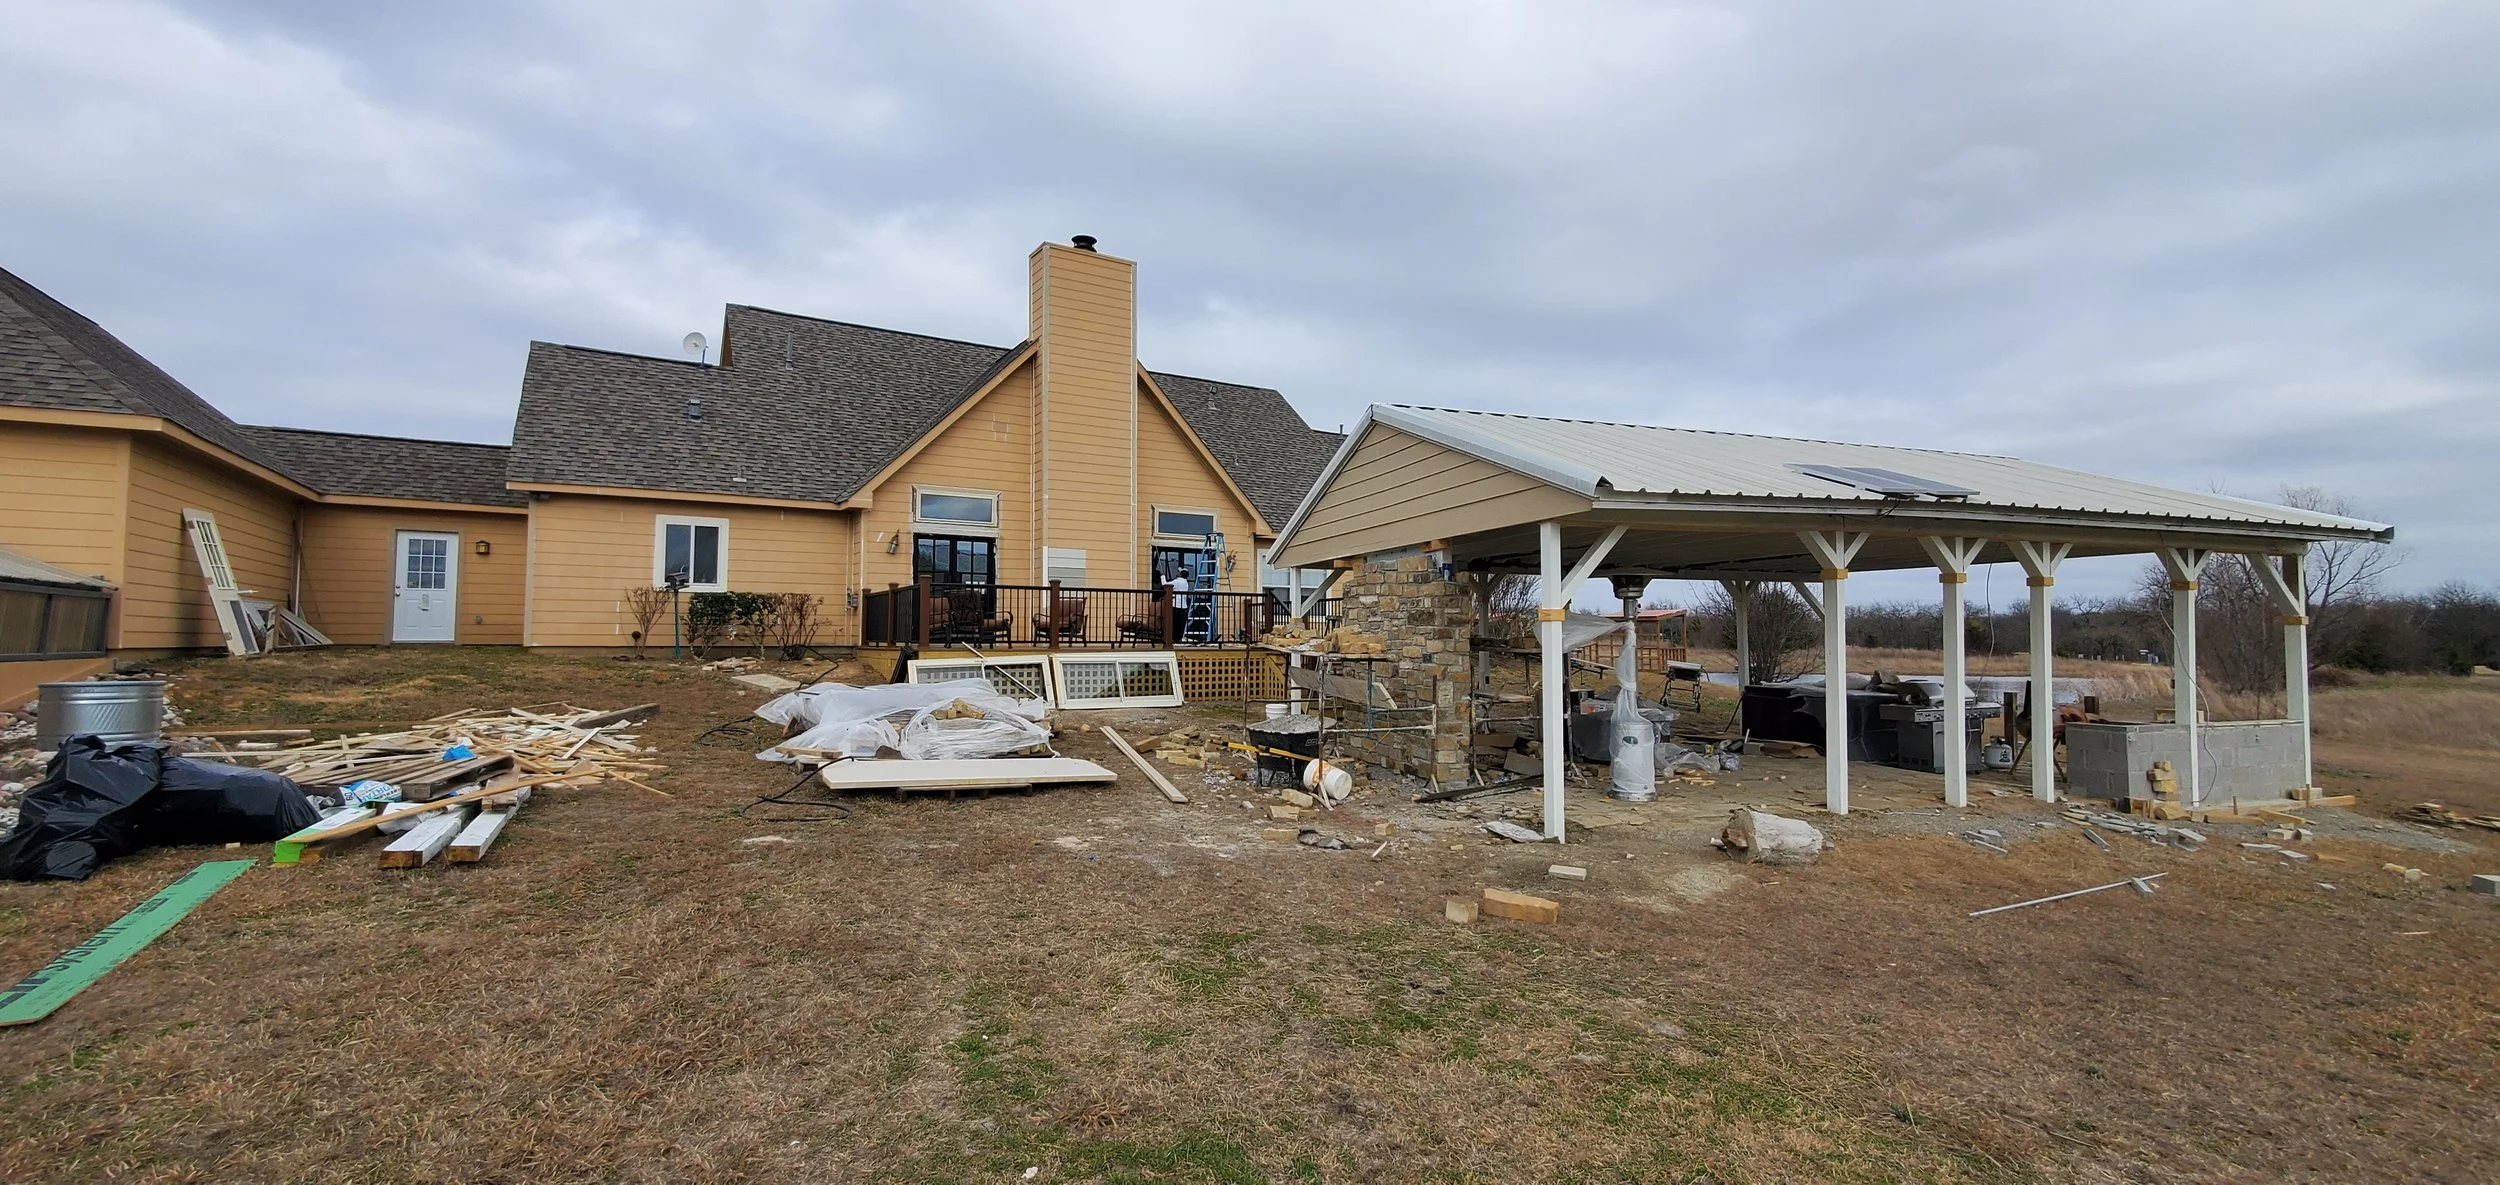
More progress - deck railing is complete, and the pavilion’s outdoor kitchen is taking shape.
Inside the pavilion before. Notice the ceiling, grill, and railings. Some support poles were rotted, but you can’t see that here.
Stone wall progress - Rodrigo did this beautifully! I still can’t wrap my head around how stone workers make this stuff happen.
Progress - Painted ceiling, new overhead lighting, new string lights, stone wall is complete, TV electrical is ready, and slatted wall is finished.
All finished! The pavilion is now perfect for this family.
Pavilion Details
The stones were intentionally meant to match the front of the home’s stonework. (For those of you who don’t know, I love the word “intentional”…it covers so many bases.) The homeowners found the perfect stones for the TV wall and the kitchen from a local stone supplier I suggested. If you’ve never gone to a place like that I highly suggest you do because the stones and rocks are more beautiful than you can see from the road! Kind of like having the canyons in piles in front of you like ornaments or jewels.
Since the intense Texas sun sets on that side of the pavilion I wanted to add the slatted walls to each side of the stone section to keep the it out of people’s eyes in the evenings. I designed it then Jorge built and painted it.
The idea came to me that this family might also enjoy an outdoor mini fridge in the kitchen space for cooking and drinks, and they fully agreed. That counter area is also set up with an outlet for a blender. How fun is that?! The counter is actually the remnant from the indoor fireplace hearth. For the lighting, we decided to have just one overhead light above the sitting area if needed, but depend on string lights for the best ambiance. Notice the spotlight over the grill? That’s for nighttime cooking. We tried to think of everything!
Like the fireplace mirror inside (haha!), the husband was understandably particular about the corner fans and the TV so I happily let him select those. My husband, Dan, found us an electrician to give the pavilion life because luckily for me that’s all part of his world.
I love this angle. The new deck is beautiful and the pavilion is no longer an eyesore.
We got all of this done and ready just in time for a graduation party. Which part is your favorite? Mine is the deck and the columns with corbels. Of course, I love the paint color because it does everything I needed it to…including making the roof look remarkable. If you’re in the Dallas area and need design help, make sure you contact me. Coming soon is the master bathroom remodel! It’s going to be amazing too, so stay tuned!


