My Favorite Interior Design Project to Date!
…And to think it all started with ceiling beams.
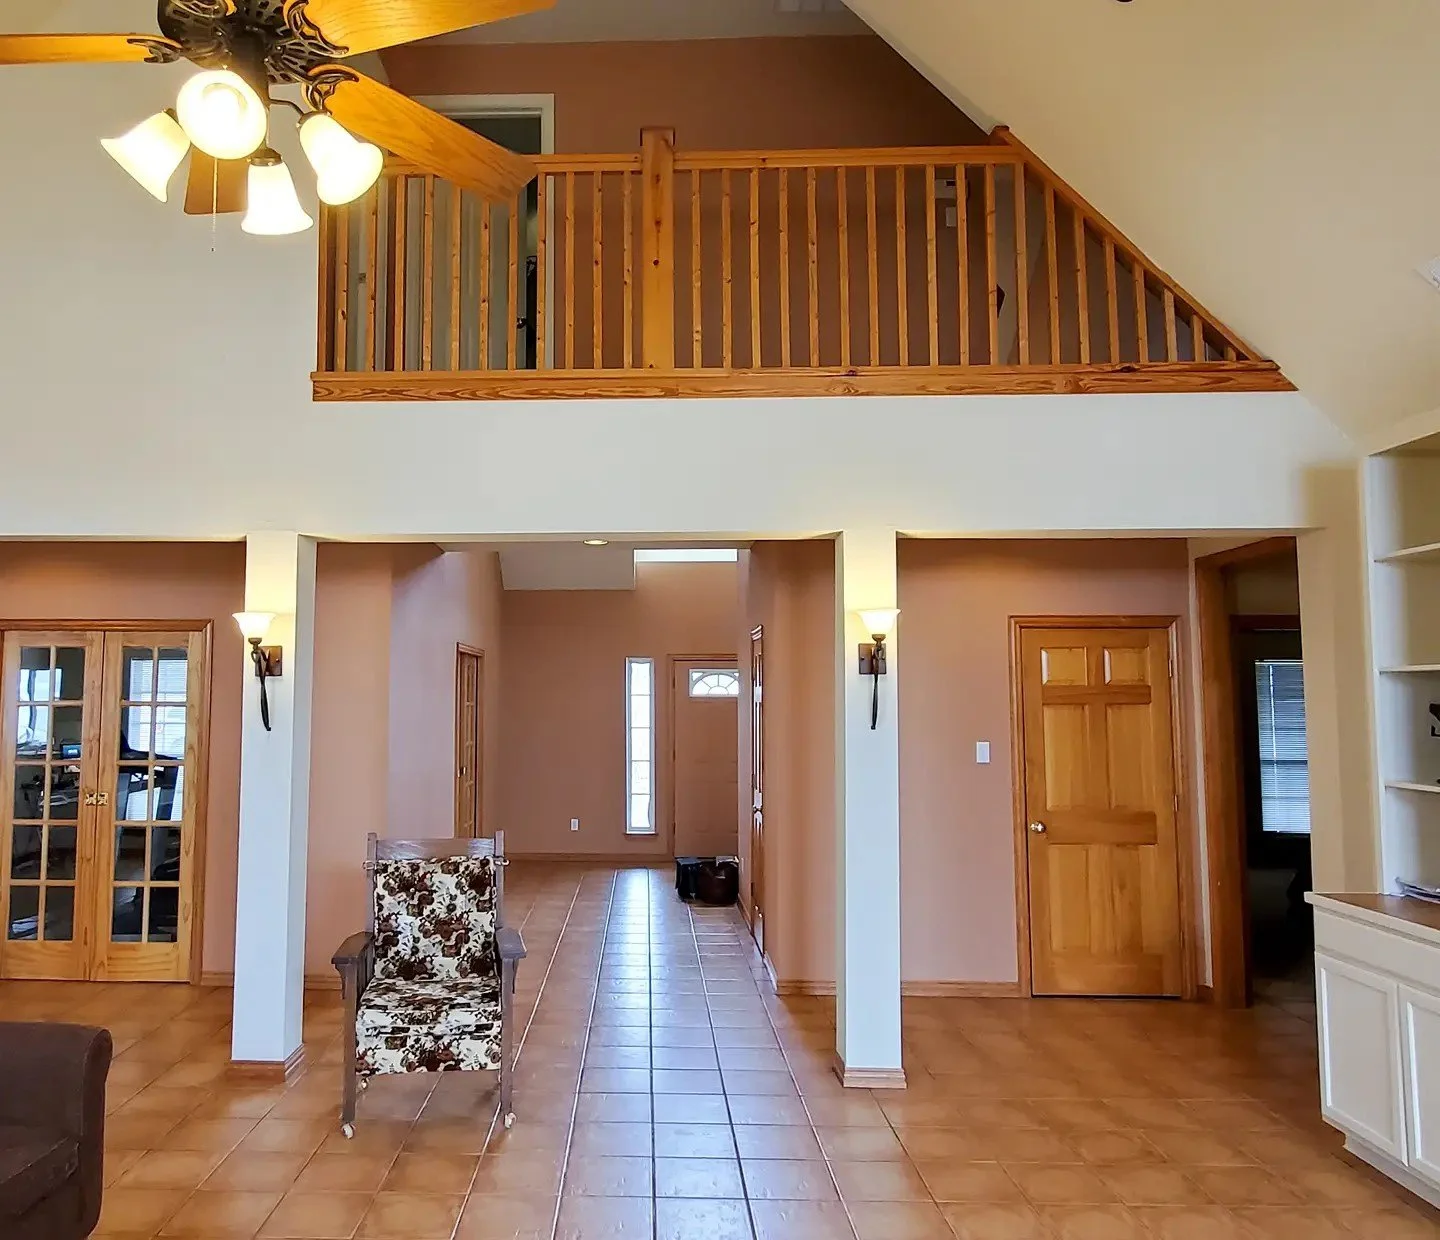
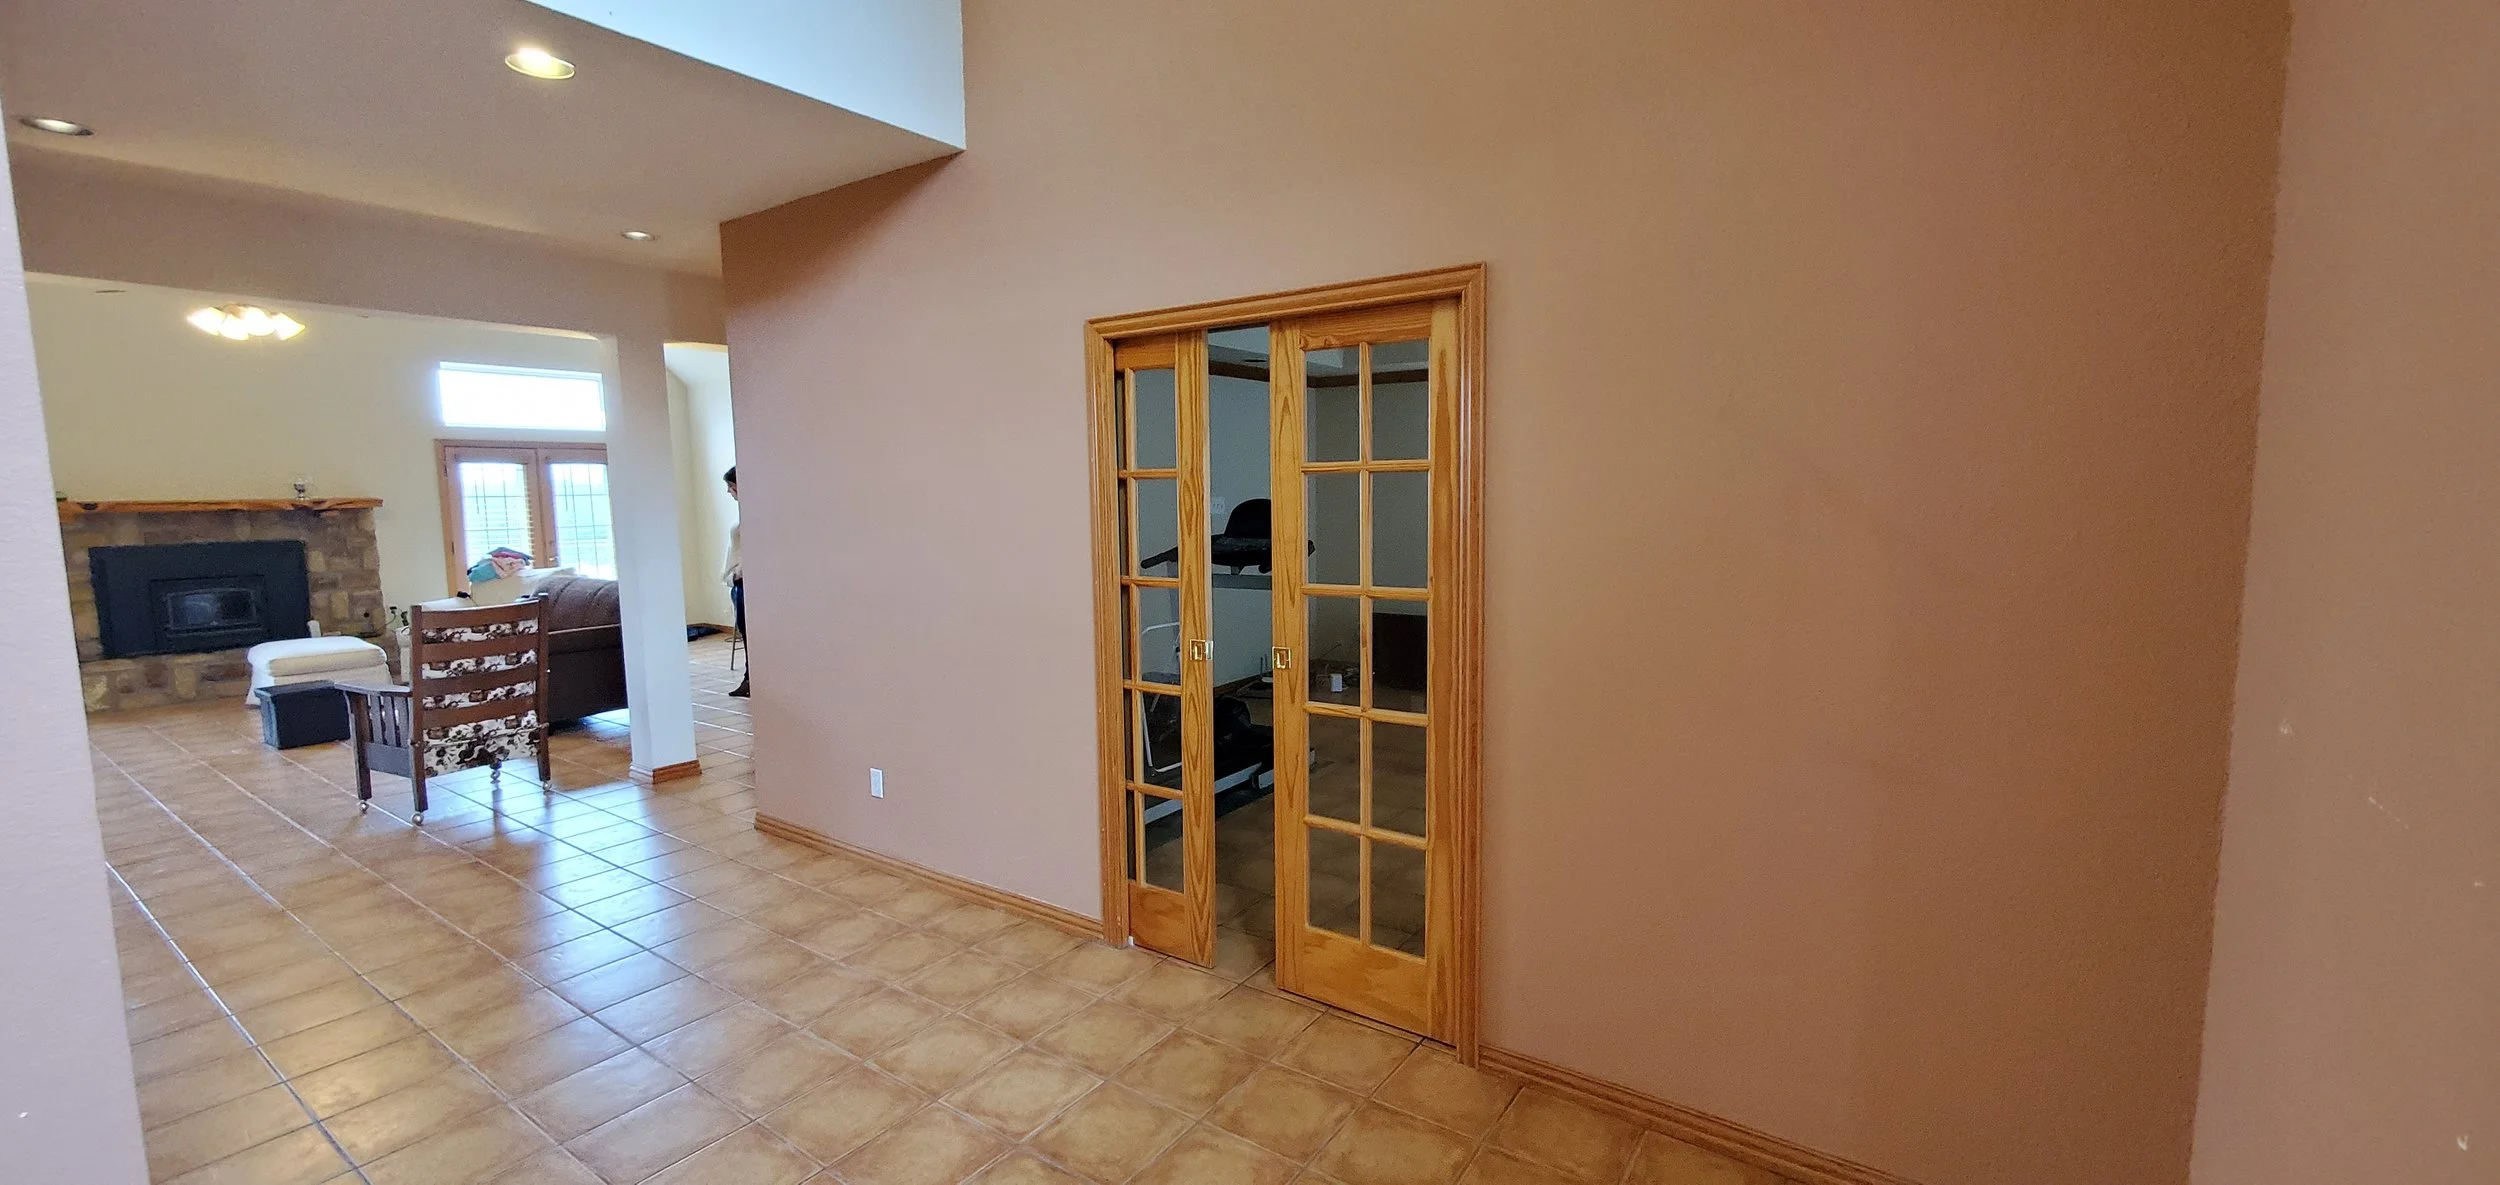
Before - consultation day.
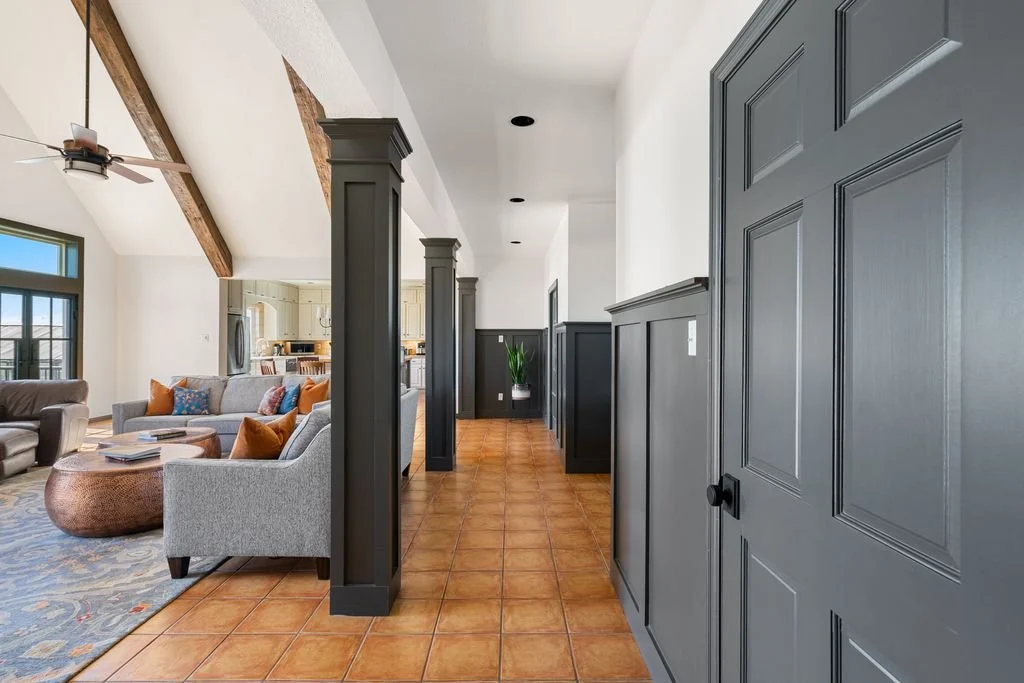
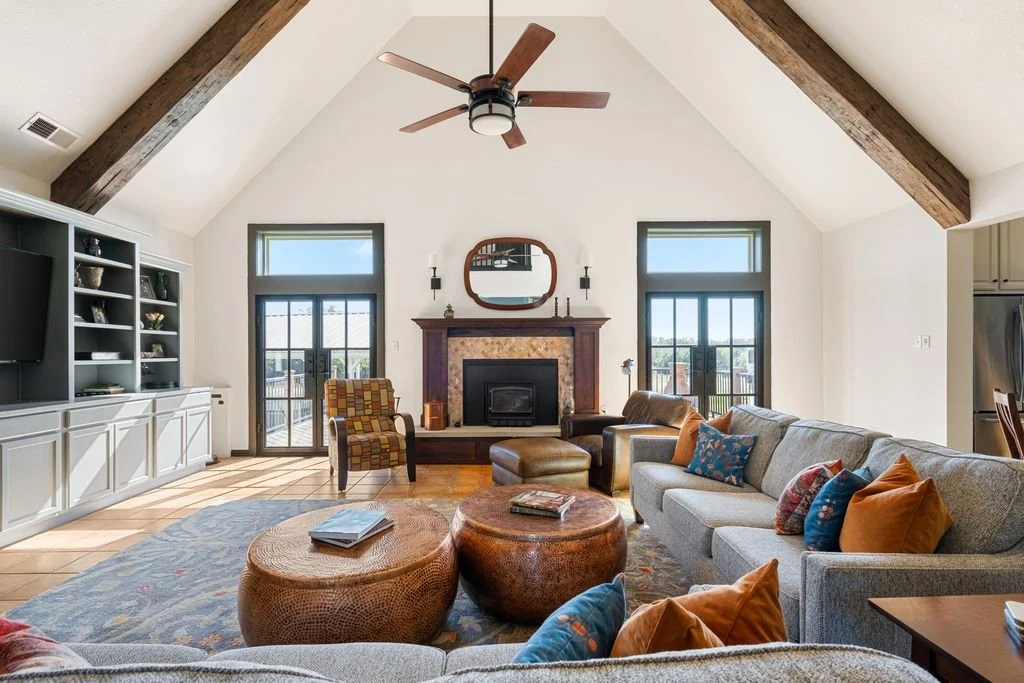
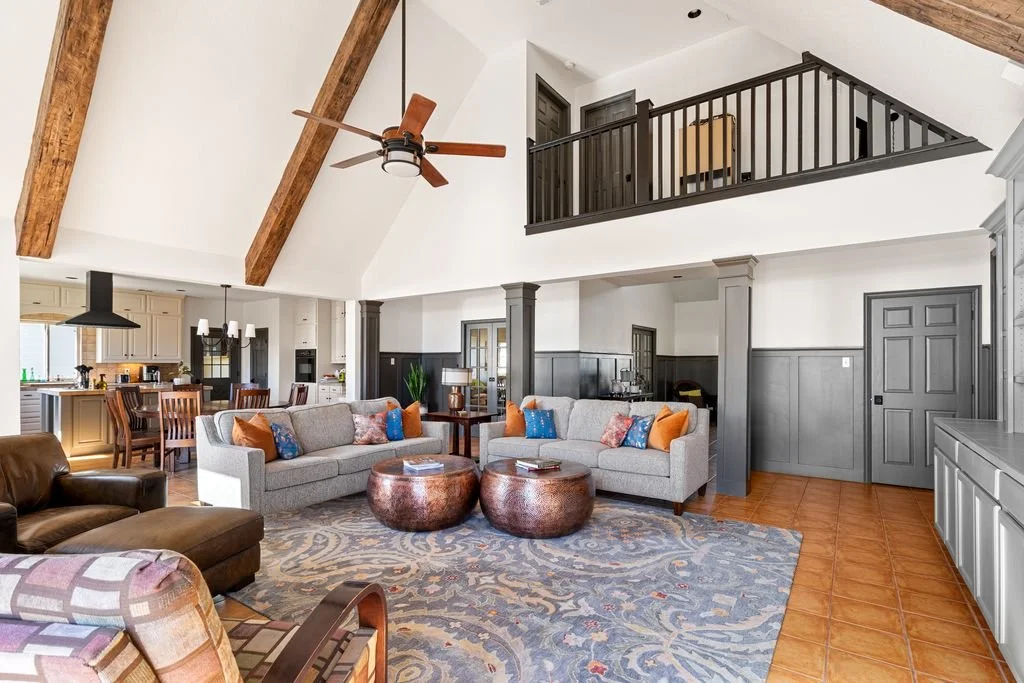
After - How is this even the same house?!
Imagine this. You just bought a home that others turned down because of its overwhelming need to be de-oranged. You’re also overwhelmed by it, but you know there’s potential…and you know for sure it needs wood beams on the high ceiling in the living room.
That was the situation when I got a text from this client wanting a consultation with me. She and her husband had recently purchased a home and knew it needed a facelift. I wasn’t sure what I was walking into and she didn’t know what to do with the very orange house, but she knew she wanted ceiling beams. Hearing that and seeing the photos of their last home that was a historic Craftsman were all I needed! From there my brain lit up with ideas like 4th of July fireworks!
Before - consultation day.
Those columns! They’re now something to look at.
As you can see, the home was most definitely very orange and very dated. An engineer custom built it, so the good thing is the house is actually very solid. The foundation is a gold mine in our area. The bad thing was the builder went to town with the floor tile, and it would not be a cheap fix.
THE BRIEF
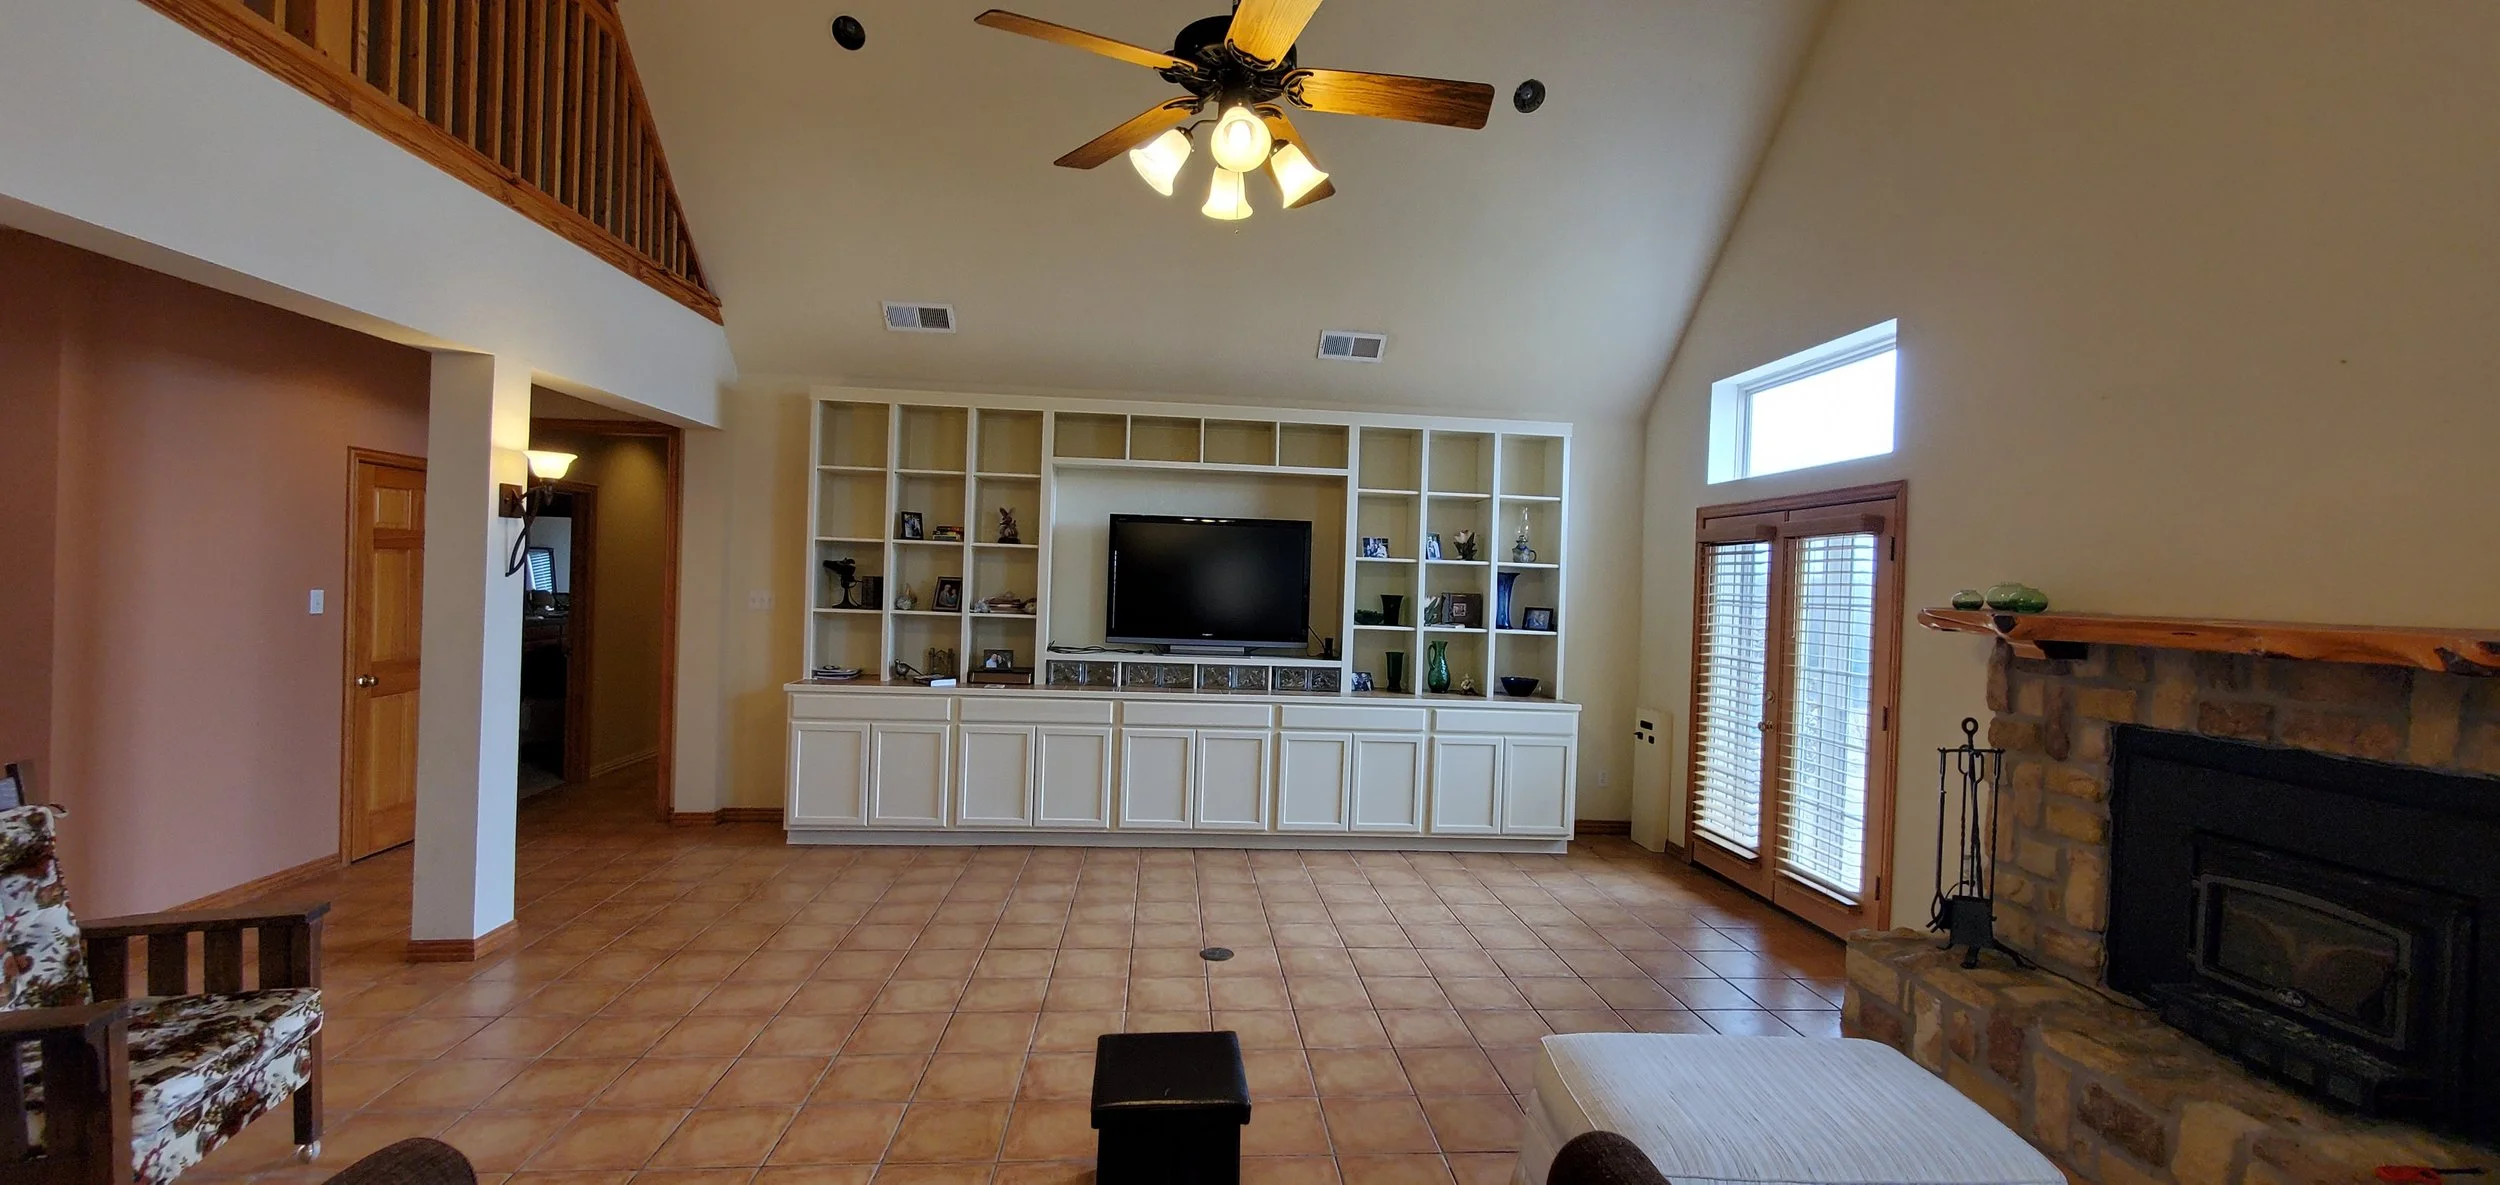
After the consultation I understood that the new owners wanted me to work with the orange tiles, come up with a solution for the media console because it looked like a crafter’s cubby system, redesign the fireplace, make the flooring look intentional, change some of the kitchen cabinets, replace the exterior doors by the fireplace, and I was free to come up with any other creative changes.
Oh boy, did my brain go on this one! I mean I lost sleep thinking about what we could do. Not in a bad way. I mean the ideas just kept coming! And the owners were on board for them, so the encouragement fed the fire! I call this house my brain child.
Some of the palette! I was so excited my clients approved it!
THE COLORS
First of all, I need you to understand that I LOVE paint colors. I have 20 years of experience playing with paint. Selecting them makes my heart so happy. I will stay down that rabbit hole until I can’t see straight! I used all Benjamin Moore paint colors and products for this job. I haven’t gotten a paint color wrong yet because I do obsess and do not color match brands.
I always ask my people what colors they love, like, and hate. Even though gray had a chokehold on almost everyone at this time (not me. Haha!), my clients actually love that color. I knew I had to use shades that were timeless and earthy, versus trendy and sterile. After getting all my info from the owners, I started brainstorming. These clients were amazing with how open to suggestions they were! I love how during all the projects we have done to their home, this couple tells me when they don’t like an idea and how easily I understand their tastes.
From all the info I gathered, my thinking was: This house is on 20 acres. The family entertains friends and family, which means a lot of life comes in and out of these doors. So taking that into consideration, it made the most sense to not have white trim or doors. One thing about me is I think of cleaning and I hate it more as I age. (I ran a successful cleaning business for about a decade, but that is for another post.) Dark trim made sense, but then another firework idea came to me that took from the Craftsman design and the current trend of using wall paneling. But again, I didn’t want to be super trendy and have this dated soon after the last paint stroke was made. Dark paneling where kids run in and out would hide the hand marks since kids seem to be like magnets to walls. Why is that?!
Then I imagined a clean, but not too bright white paint color covering the walls and ceiling throughout the entry, stairwell, upstairs hall, living room, and kitchen was perfect for keeping the home airy and allow for the other elements to truly pop.
Ceiling beam sample with the fireplace tiles, fireplace mantle stain, and the paint samples. You can see the flooring to the right.
Fireplace progress.
I was incredibly particular about how I wanted the tiles and my contractor was so patient with me. I work with the best!
Seeing the tiles go up made me feel like a kid on Christmas morning!
Before - consultation day. The media cabinet needed help.
This view - Chef’s kiss. Look at the media cabinet now!
Before - consultation day. More cubbies!
The cabinet maker matched the existing doors perfectly!
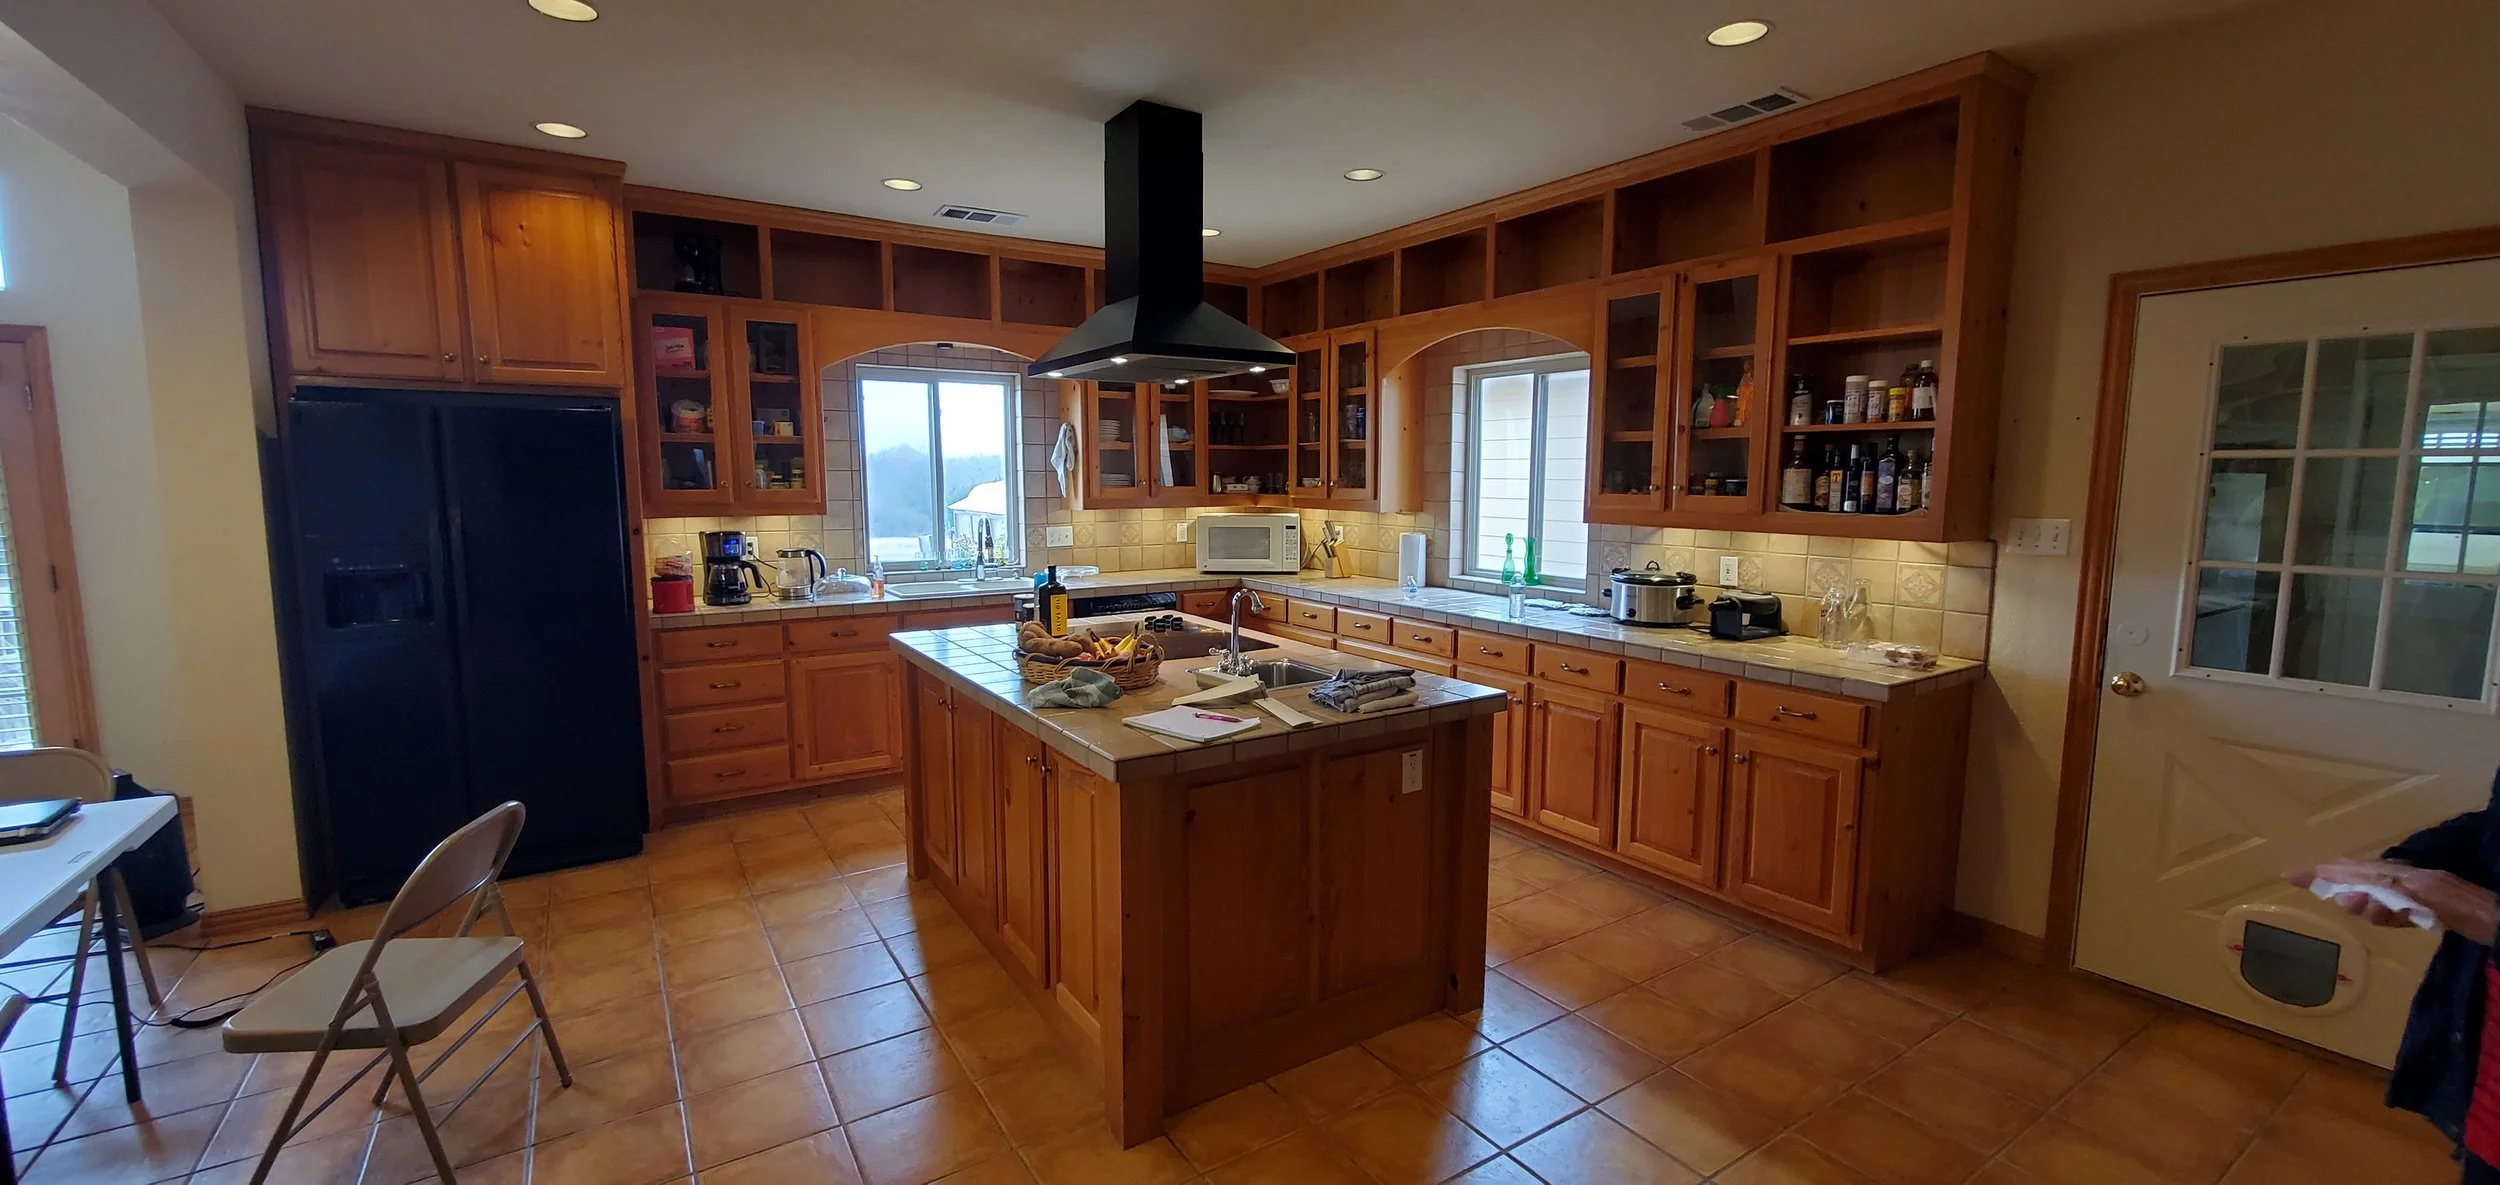
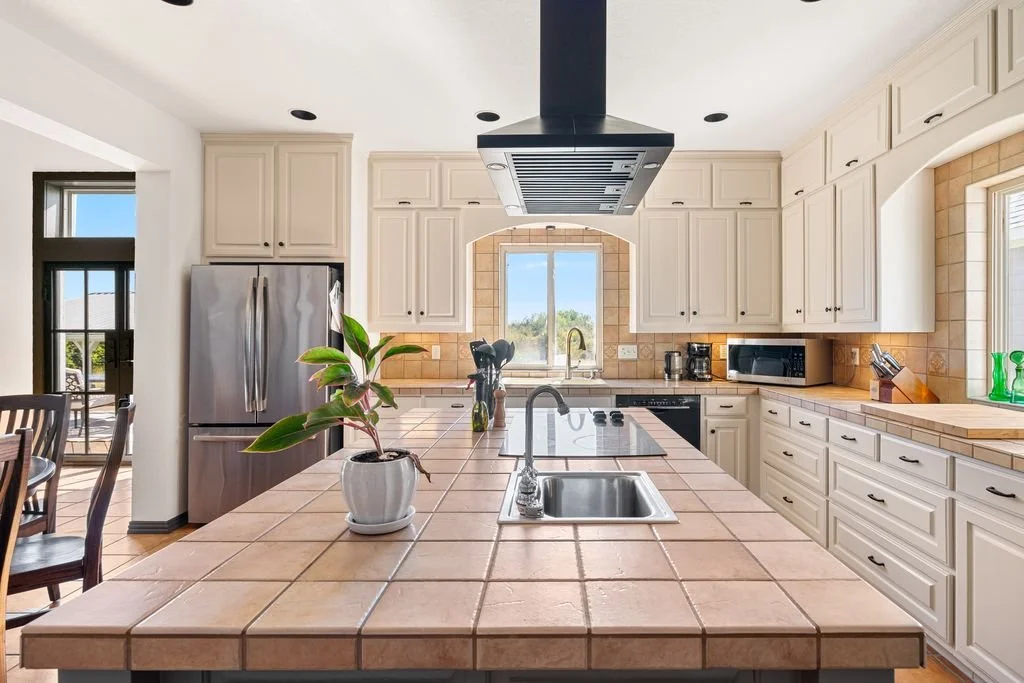
Close-up of the kitchen cabinets.
I put a ton of work into making sure the colors I select work on their application and play well with everything else.
With the kitchen cabinets being customized by the brilliant Keith Farr cabinet maker, I envisioned using a warm greige that made the tiles on the countertops look intentional. Which also added depth to the scheme that had a good amount of warm grays. To continue the goal of adding depth, I used a lighter dark gray for the island to help the existing black range hood ground the kitchen. We finished off the kitchen with black hardware that fit in with the home and our style goal.
The beautiful custom-made and hand-delivered dining set from Amish Tables out of Ohio will last for generations to come.
I will be honest. I wasn’t sure about having the dining table here, but the family wanted to use the dining room for a home office. Which does make sense too. The previous owner had a vanity light basically where the chandelier is, so it was an easy idea to make work. I knew a round table would serve them the best here. The chandelier is meant to flow with the fireplace sconces and not take up too much visual space so it doesn’t feel crowded in the space. When it was all done I ate my lunch. I love the dining area! You’ll hear me say often that I love to learn from people, so I don’t want to always be right. Growth is good!
The dining table is a wonder in itself! We had Amish Tables custom make their dining set that seats 8, and has leaves that go smoothly in and out to make sure all their dining needs are met. Amish Tables was incredibly easy to work with, and sent us samples of stain choices on their wood. They even delivered the set from Ohio! It was obvious that the skilled woodworker took pride in his work by the way he set up the table, and clearly evident in the beauty and comfort this set offers. Also, it’s holding up superbly!
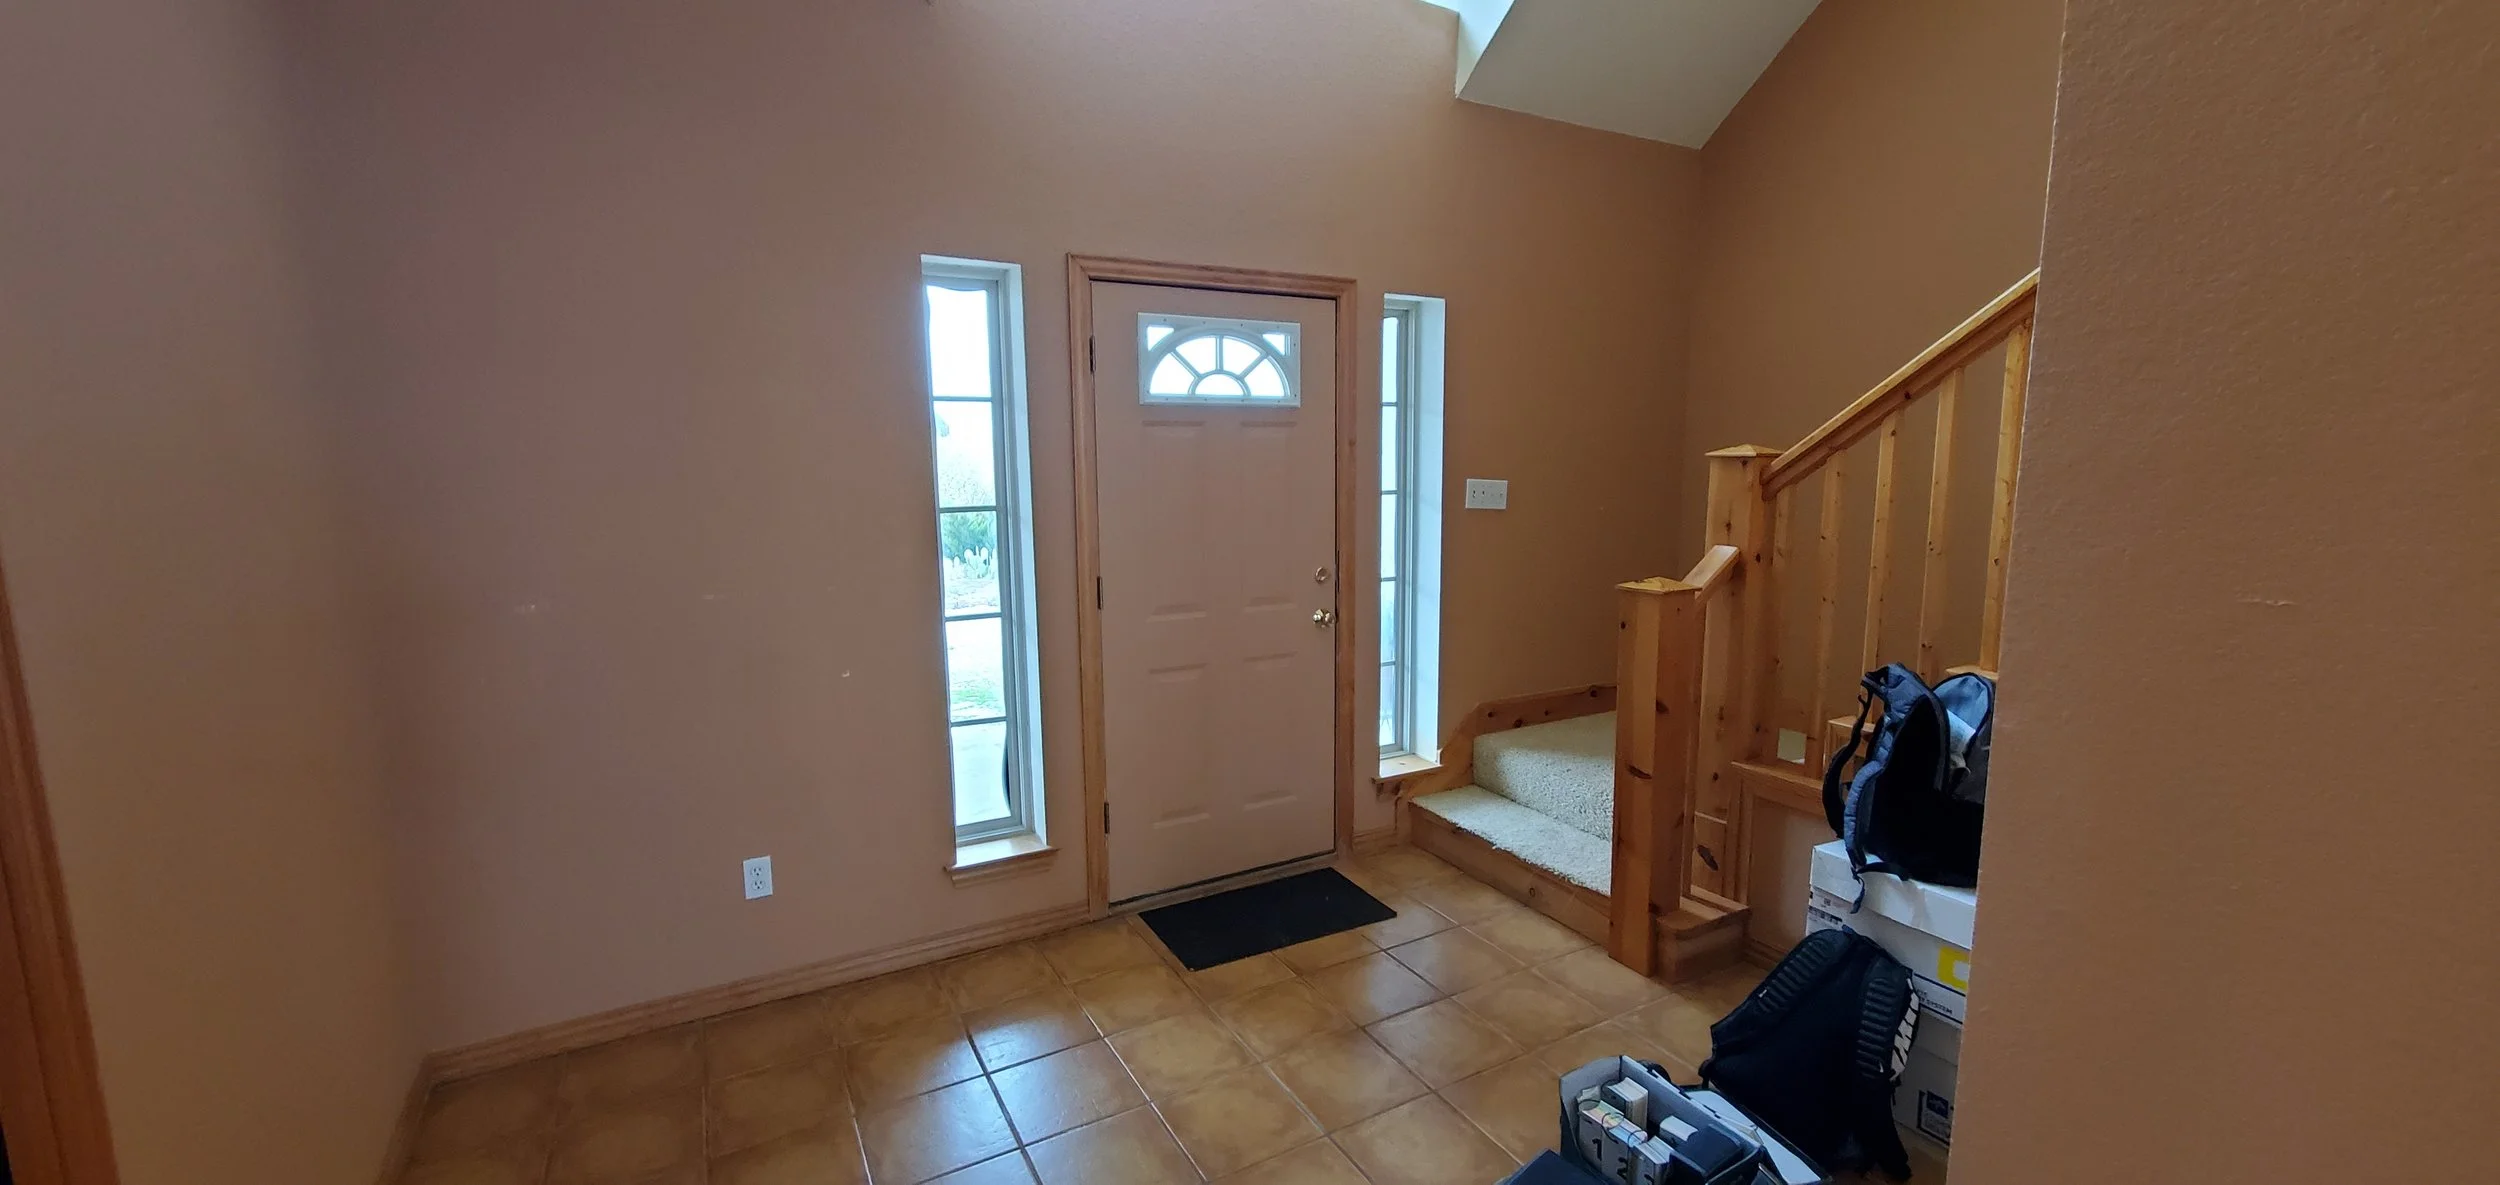
Before - View from the front door on consultation day.
The wow now when entering this home! I love that when visitors walk in they are greeted with this view instead.
Adding to the columns changed the space! They inspired the way I wanted the doors and windows trimmed out, and even how I wanted the exterior porch columns changed. (Blog on that coming soon.) It’s amazing what some imagination with finishing work did to this home. I can’t get over how talented the contractors were here making all the ideas and what was in my head come to life. They also had a ton of patience with me as we figured out how to make it all happen. For example, I had to figure out the perfect height for the wall paneling since the home has different levels of ceiling heights; and where it should go up the stairs. It was a lot of work, but so worth it.
Before - consultation day. Just so much orange!
New door and woodwork added Craftsman character!
The stair railing was the same orange, knotty wood as the rest of the home, so they also needed paint. Black worked well as a classic that provides some contrast to the dark gray, and pairs well with the black range hood from the view in the living room where you can see it and the upstairs railing.
More Craftsman character! Would you believe this entry table is from Facebook Marketplace?
You can see an obvious difference in these photos! While you see the large amounts of primer and paint used, and even the materials added to the walls, columns, door frames, cabinets, and fireplace, the devil is truly in the details. We changed hardware on the kitchen cabinets, and the doorknobs and the hinges to update this home to be a modern Craftsman.
This transformation was no doubt largely brought to you by paint. During the time we took on this project lumber was crazy expensive, and even the paint world was crazy. The contractors had to learn new products and work with what was available. They did it all well, and we made it to the finish line!
The beams definitely were the needed cozy factor here!
The wood beams - would you believe those are faux?! They are from Ekena Millworks; which isn’t that far from us. We had to move a ceiling vent to make them happen. Eek! But my contractors were just glad the beams were not real, heavy wood! That’s when they would’ve truly been cussing me. Trust me when I say these pros put up with a lot from me, but I know where to draw the line. Ha!
I cannot take credit for the French doors flanking the fireplace. My clients have amazing taste and found these. It was my idea to frame out the doors and window to connect them and to give more Craftsman character. Which I also had my amazingly talented contractors do to the front door and sidelights.
The fireplace woodwork and the media cabinet are both more examples of Keith Farr’s talents. The hearth was a labor of love for the homeowners. They found the stone that resembles concrete and installed it themselves! The tiles on the surround are from a website I found that imports from Italy. They go so well with the flooring, and help the goal of making it look intentional. Having sconces on the columns didn’t make sense to me, but they did inspire me to move the idea to over the fireplace.
I have to share with you all the story of the mirror above the fireplace! The husband is a wonderful man who was easily satisfied during this whole project. He went along with all the ups and downs of everything. But let me tell you, he had an idea for the cherry on top of this fireplace! I sent mirror after mirror for him to turn down. Haha! The mirror he had to have was a Stickley. I won’t tell you the price, but I will tell you that mirror is going to be around for generations. Even the backing on it is real, solid wood. And my goodness is it beautiful right there in all its glory! I am honestly so impressed. That’s a memory I hope I don’t forget because it always makes me smile.
Oh! We can’t forget the ceiling fan light fixture! That is a Kichler from Build.com. It was the right size and just goes with the room like it was custom made for it. How could we pass it up?!
Mood board for furnishing.
To finish off the look, the owners had me help the select furniture, a rug, and pillows. You really can’t go wrong with a wool rug because they’re comfortable and last forever! We needed a big boy for this space, but we found the perfect rug on Wayfair. The sofas are good ole Flexsteel from Nebraska Furniture Mart. We found a beautiful Italian leather chair and ottoman you can see in the finished photos from a local furniture store. These items should give comfort to their family and friends for years to come. The pillows can be easily changed whenever the mood strikes. Aren’t those copper drum coffee tables amazing?? I found those on Wayfair of all places too, and they have storage. We love how unique they are, but practical. Lamps Plus had the most perfect Craftsman table lamp to go on the Stickley end table we found. And you can see THE mirror being represented. (I’m smiling right now.)
Real life never looked so beautiful, if you ask me!
So there you have it. The majority of the story of how I tackled this large project with these amazing homeowners who have become friends, and my talented contractors. Let me know in the comments what your favorite part or parts of this home are. I can’t decide for sure, but I do love that fireplace. Thank you for reading! Check out my next post to see the exterior transformation. If you’re in the Dallas area and need any help with design, staging, or photography I am here for you!


